Accounts Receivable and Payment Tracking
Generating a beautiful invoice is only half the battle; ensuring it gets paid on time is what keeps your business running. The Evolvv accounts receivable platform provides a centralized command center to track every penny owed to you, automate tedious follow-ups, and verify offline payments.
By keeping a tight grip on your pending and overdue metrics, you drastically reduce late payments and improve your overall cash flow.
Here is a complete guide to mastering the Payment Tracking dashboard.
Step 1: The Cash Flow Overview Dashboard
Navigate to the Payment Tracking tab located under the Payment section in your left-hand menu.
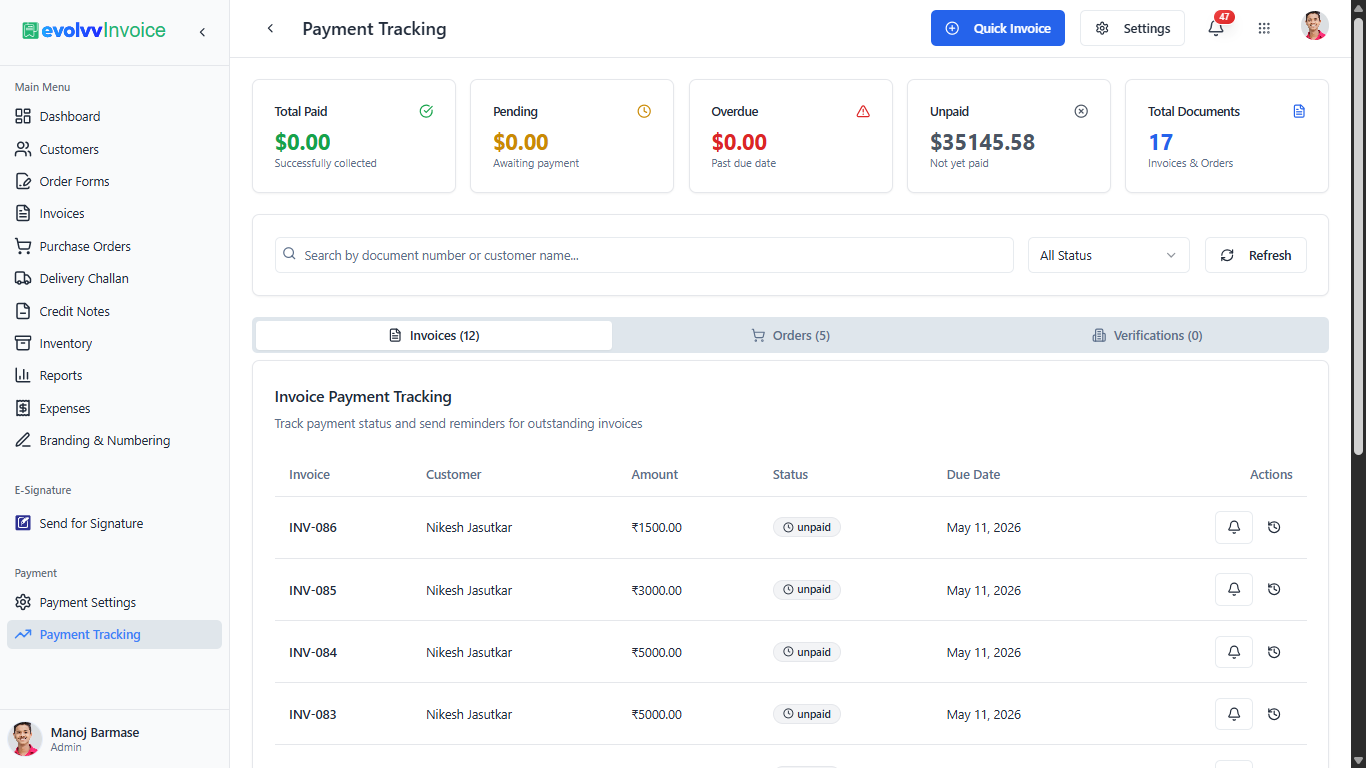
At the top of the screen, you will see your primary financial health indicators (KPIs):
- Total Paid: The total revenue successfully collected.
- Pending: Payments that are initiated or awaiting clearing.
- Overdue (Red): Critical alerts for invoices that have passed their legally binding due dates.
- Unpaid: The total outstanding accounts receivable balance.
Below these metrics, the dashboard is divided into three actionable tabs: Invoices, Orders, and Verifications.
Step 2: Sending Automated Payment Reminders
Under the Invoices tab, you will see a list of all outstanding documents. Instead of manually drafting emails to chase clients, Evolvv automates this process.
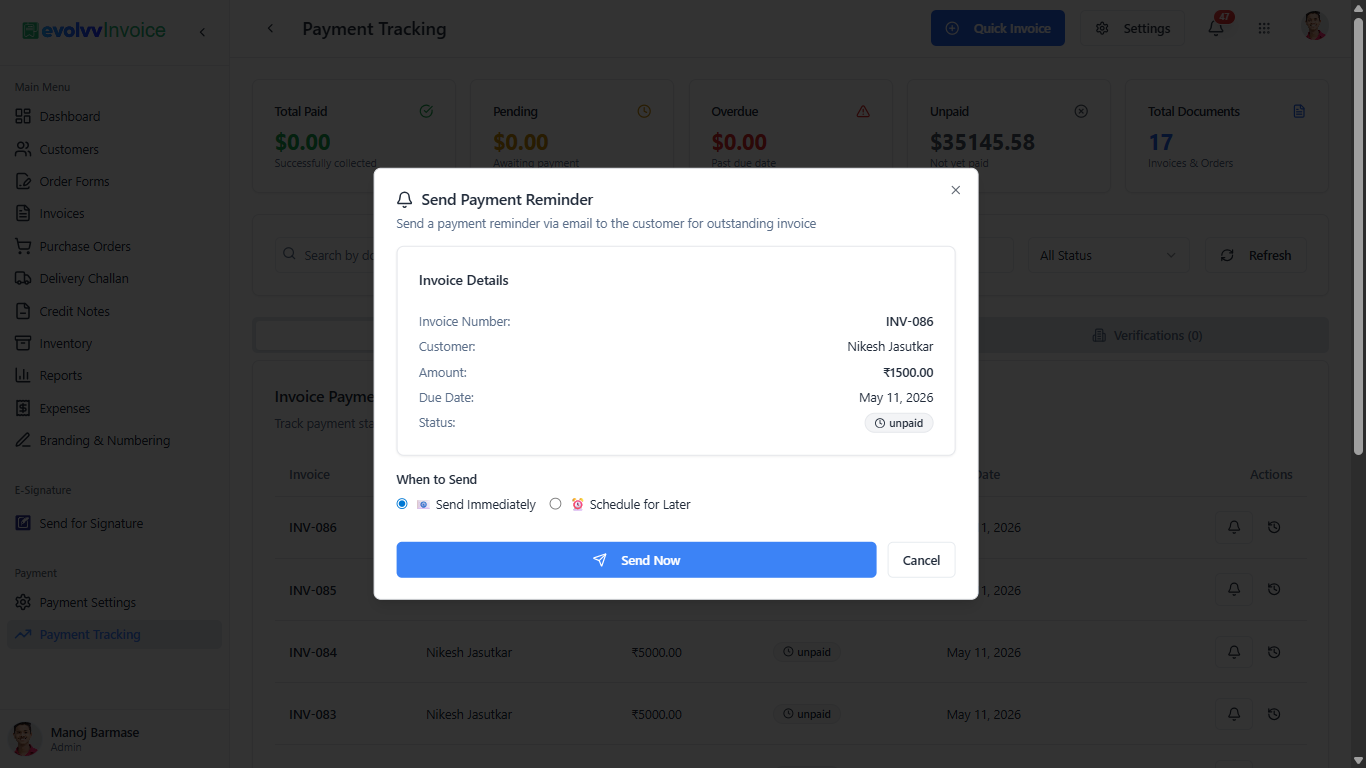
- Triggering a Reminder: Click the Bell Icon under the Actions column next to any unpaid invoice.
- Scheduling: A modal will appear displaying the invoice details. You can choose to Send Immediately or Schedule for Later. The system will dispatch a professionally worded email to the client, complete with a direct "Pay Now" link.
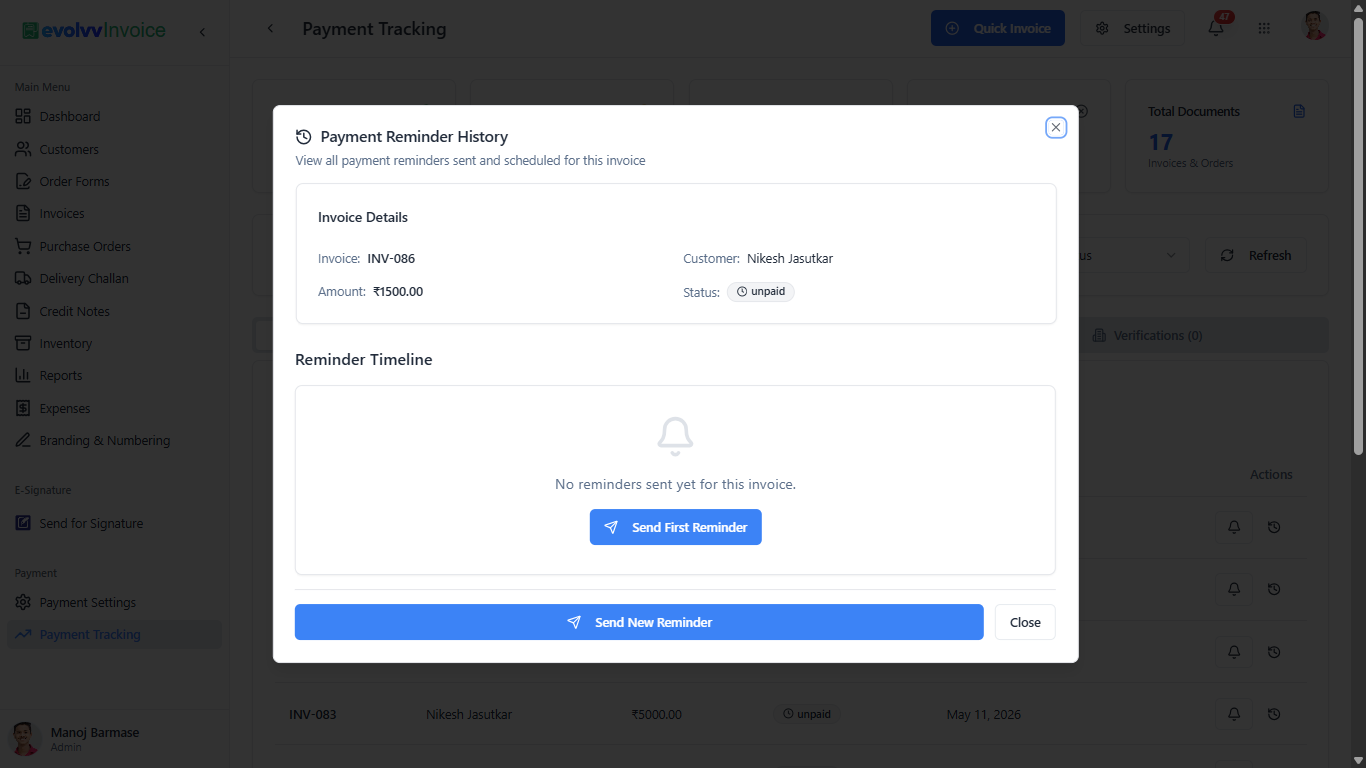
- Tracking Follow-ups: Click the History (Clock) Icon next to the bell. This opens the Payment Reminder History timeline, providing a complete audit trail of exactly when reminders were sent and scheduled, ensuring you never double-email a client by mistake.
Step 3: Tracking Order Forms
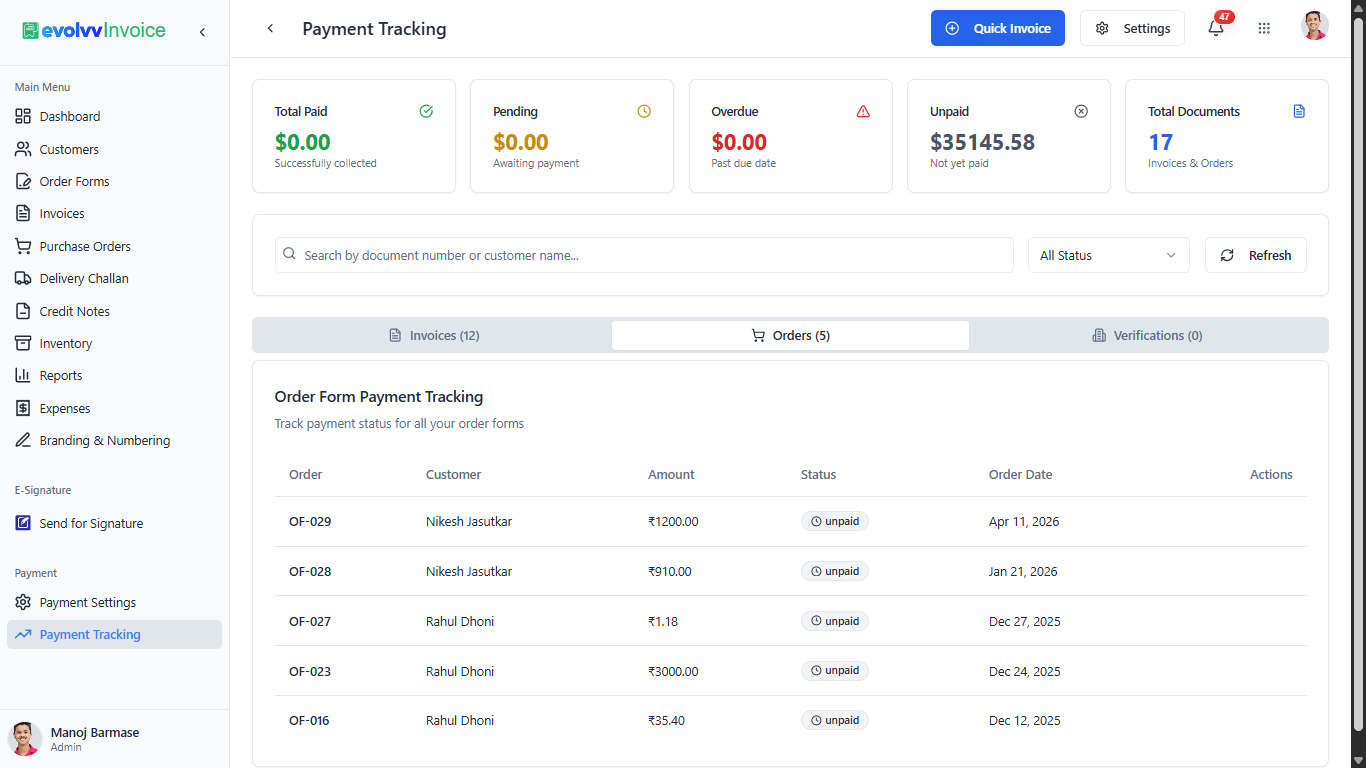
Switch to the Orders tab to monitor the financial status of your proforma invoices and pre-sales order forms. This ensures your sales team knows exactly which clients have cleared their advance payments before initiating the service or dispatching goods.
Step 4: Manual Payment Verifications
Not all clients pay via the integrated online gateways. Many enterprise clients prefer NEFT, RTGS, or manual UPI transfers.
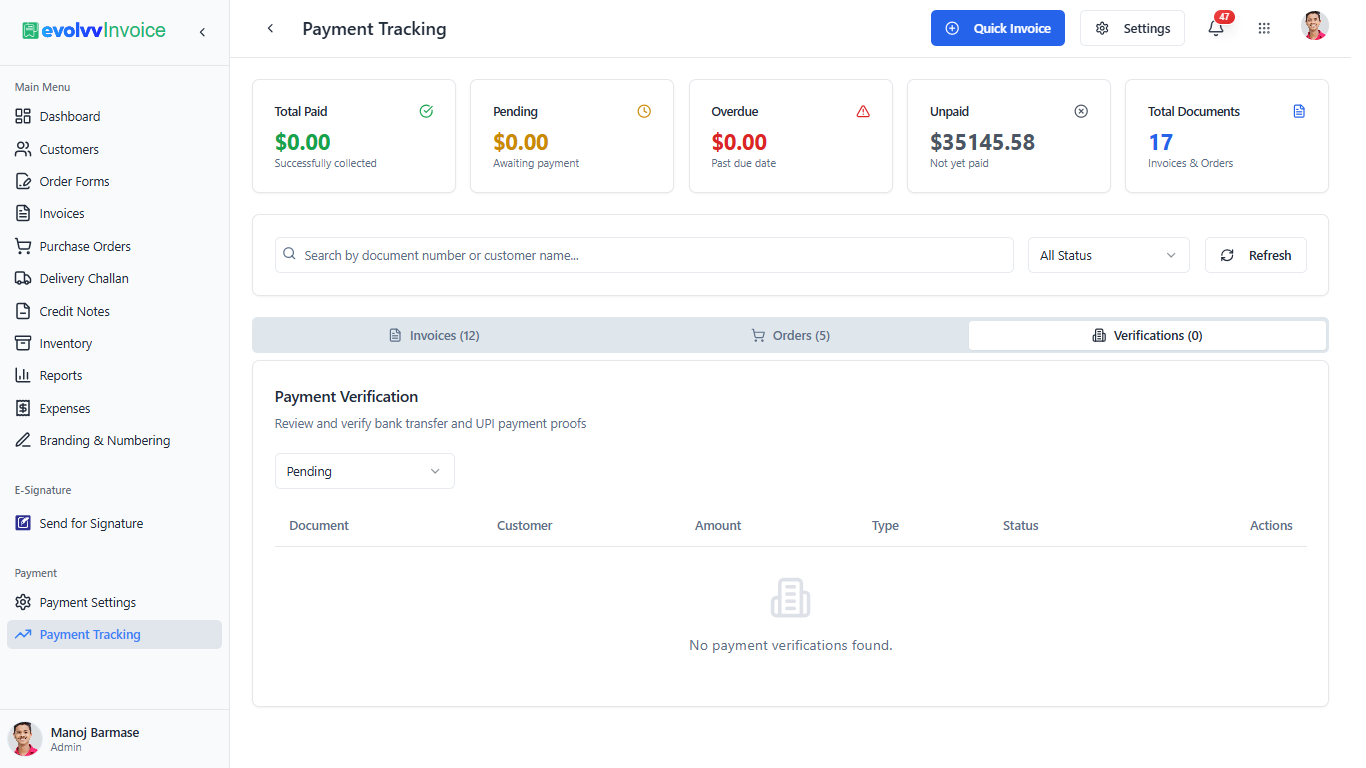
Switch to the Verifications tab. When a client uploads a screenshot of a bank transfer or a UPI transaction ID via their client portal, it lands in this queue.
- Your accounts team can review the attached proof against your actual bank statement.
- Once verified, you can manually mark the invoice as "Paid," instantly updating your global dashboards and sending a digital receipt to the client.