How to Add and Manage Customers
A clean and organized client directory is the backbone of efficient billing. The Evolvv billing platform provides a centralized CRM-style interface to manage all your customer details, ensuring that every invoice you send is accurate and compliant.
From the Hub, navigate to the Customers tab on the left-hand menu to access your client directory.
1. The Customers Dashboard
The main Customers page provides a bird's-eye view of your entire client base.
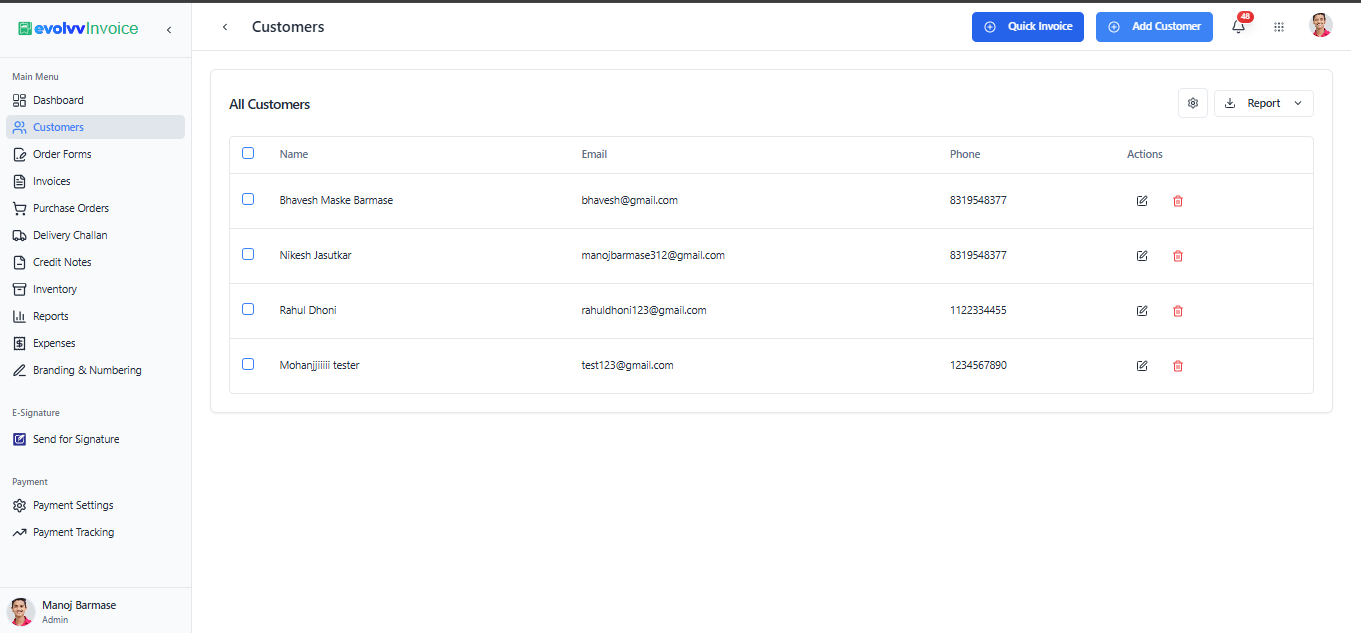
From this dashboard, you can:
- View Key Details: Quickly scan customer names, associated email addresses, and phone numbers.
- Take Quick Actions: Use the action icons on the right to Edit an existing profile or Delete a duplicate entry.
- Generate Invoices Instantly: Select a customer and click the Quick Invoice button at the top to bypass standard setup and jump straight into billing that specific client.
2. Adding a New Customer (Personal & Company Info)
To add a new client to your database, click the + Add Customer button in the top right corner. This opens the customer creation form.
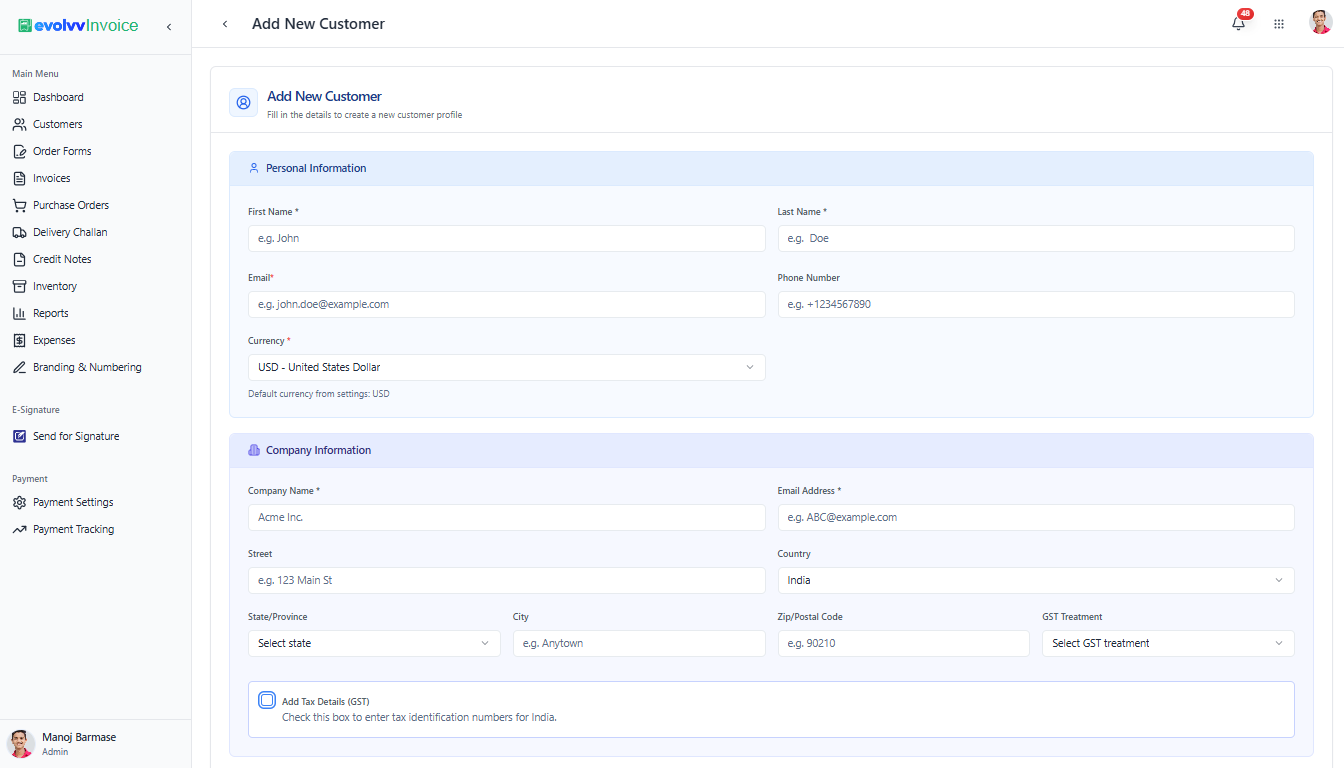
Personal Information:
- Enter the primary contact's First and Last Name, Email, and Phone Number.
- Currency: Select the default billing currency for this specific client (e.g., USD or INR). Whenever you create an invoice for this customer, Evolvv will automatically default to this currency.
Company Information & Tax Compliance:
- Fill in the official Company Name and their corporate email.
- GST Treatment: If you are operating in a tax-compliant region (like India), check the Add Tax Details (GST) box. This ensures the correct tax identification numbers are applied to all future invoices for this entity, keeping your business legally compliant.
3. Configuring Billing and Shipping Addresses
Accurate addresses are crucial for legal documentation and physical deliveries (if applicable via Delivery Challans).
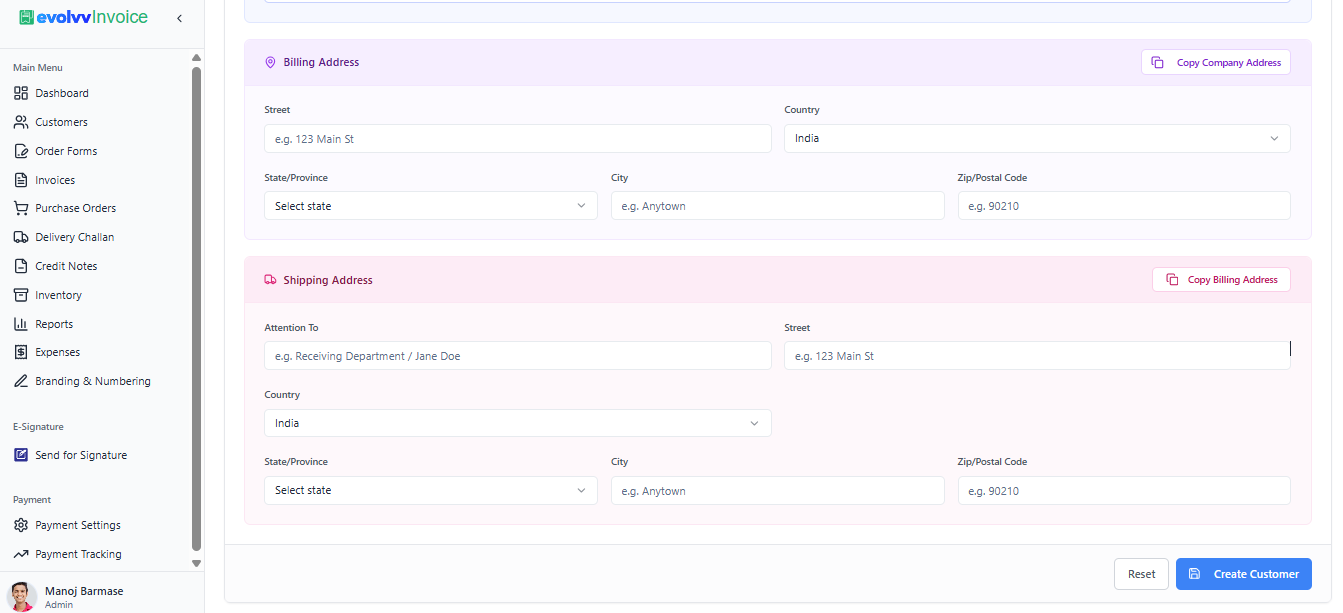
Time-Saving Features:
- Billing Address: Enter the primary address where invoices should be registered. If this is the same as the company address entered above, simply click the Copy Company Address button to auto-fill the fields.
- Shipping Address: If you deliver physical goods, enter the shipping destination. If the shipping address is identical to the billing address, click the Copy Billing Address button to duplicate the data instantly.
Once all details are verified, click the blue Create Customer button at the bottom right. Your new client is now permanently saved in your directory and ready to be billed!
What's Next? With your customer directory populated, you are ready to start generating revenue. 👉 Read Next: How to Create a Standard Invoice