Creating and Managing Order Forms
Before a final invoice is generated, businesses often rely on Order Forms to establish clear agreements regarding services, pricing, and commitment periods. The Evolvv business management suite provides a robust Order Form builder designed to streamline this pre-sales process.
Navigate to Order Forms on your left-hand menu to get started.
1. The Order Forms Dashboard
Your primary dashboard lists all your drafted, sent, and accepted order forms in one organized view.
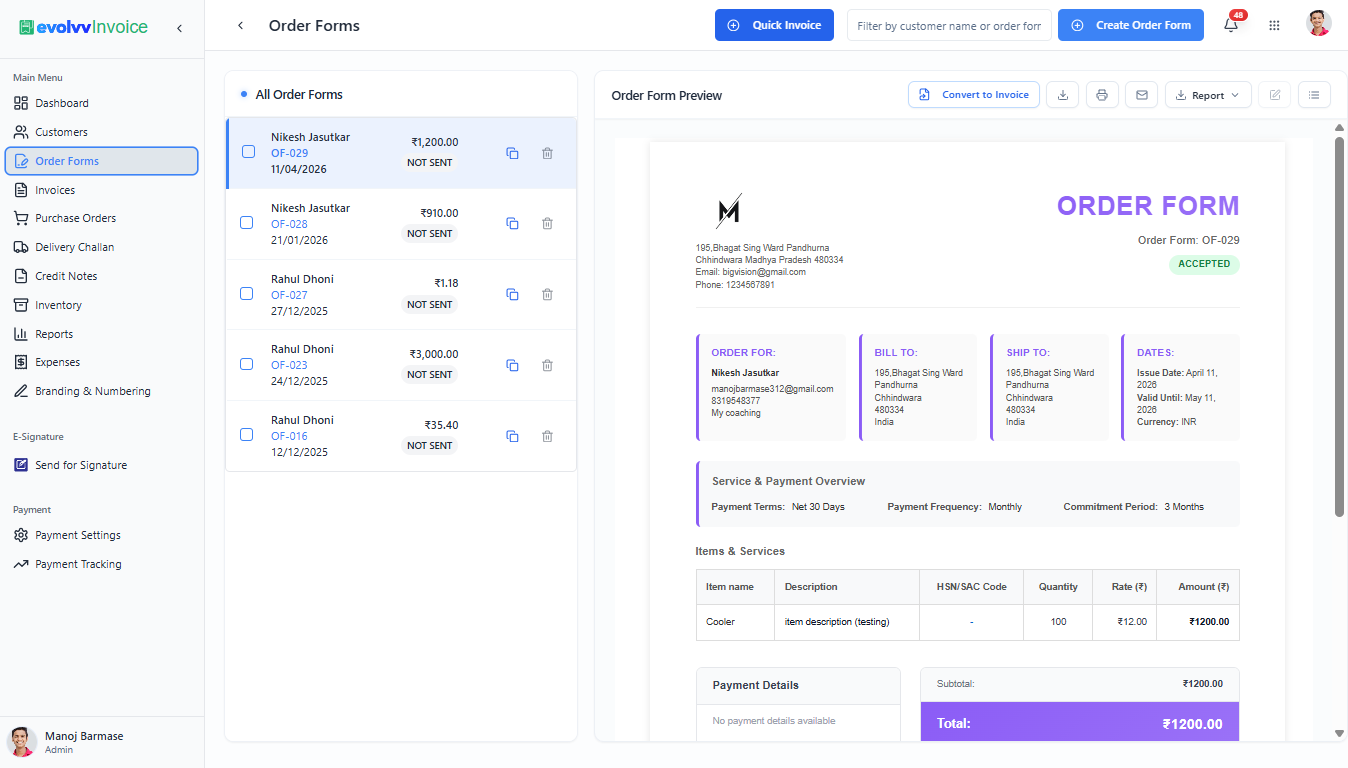
From this screen, you can:
- Preview Instantly: Click on any order form to view a full-page preview on the right side of your screen without leaving the list.
- Track Statuses: Monitor which forms are Drafts, Not Sent, or Accepted.
- Convert to Invoice: Once a client agrees to the terms, use the Convert to Invoice button at the top of the preview pane to instantly generate a payable invoice—eliminating duplicate data entry.
2. Creating a New Order Form
To draft a new agreement, click the blue + Create Order Form button.
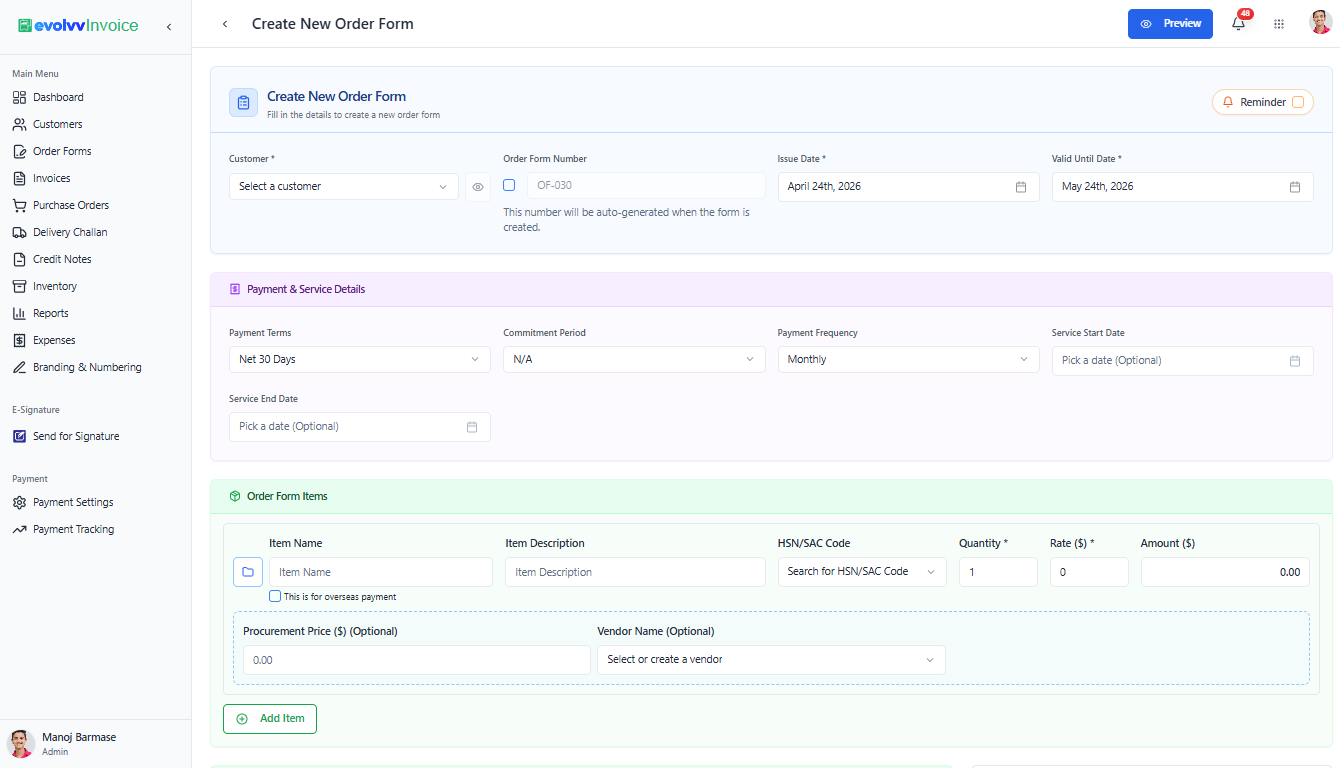
Initial Setup:
- Customer Selection: Choose an existing client from your directory.
- Key Dates: Set the Issue Date and a Valid Until Date to create urgency for the proposal. The Order Form Number is auto-generated for your convenience.
Payment & Service Details: This section is crucial for service-based businesses and recurring billing.
- Payment Terms & Frequency: Define when payment is expected (e.g., Net 30 Days) and how often (e.g., Monthly).
- Commitment Period: Specify the length of the contract (e.g., 3 Months).
- Service Dates: Clearly outline the exact start and end dates of the service delivery.
3. Adding Items and Taxes
Scroll down to the Order Form Items section to list the deliverables.
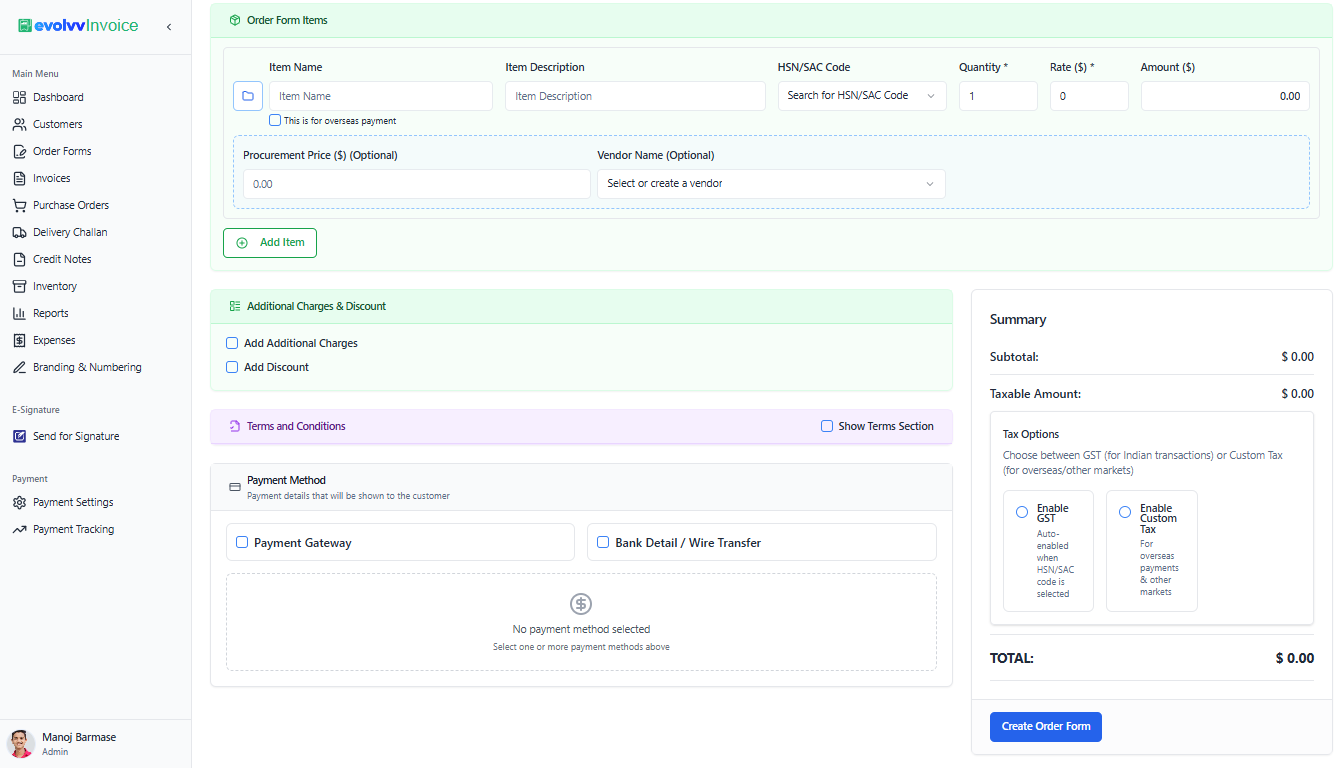
- Line Items: Add the item name, description, quantity, and rate. You can also specify the HSN/SAC code for tax compliance.
- Advanced Item Options: Use the toggles to flag items for overseas payment, or track your internal Procurement Price and Vendor Name for profit margin analysis.
- Tax Options (Bottom Right): In the Summary panel, choose your tax framework. Select Enable GST for domestic Indian transactions (auto-enabled based on HSN/SAC), or Enable Custom Tax for international or specialized markets.
4. Configuring Payments and Finalizing
- Additional Charges: Easily add discounts, shipping fees, or terms & conditions at the bottom of the page.
- Payment Method: Select how you want to be paid once the form is converted to an invoice (Payment Gateway or Bank Detail/Wire Transfer).
Preview Before Sending: Always click the Preview button (top right corner) before saving. This generates a realistic modal view of exactly what your client will see, complete with your branding and authorized signatures.
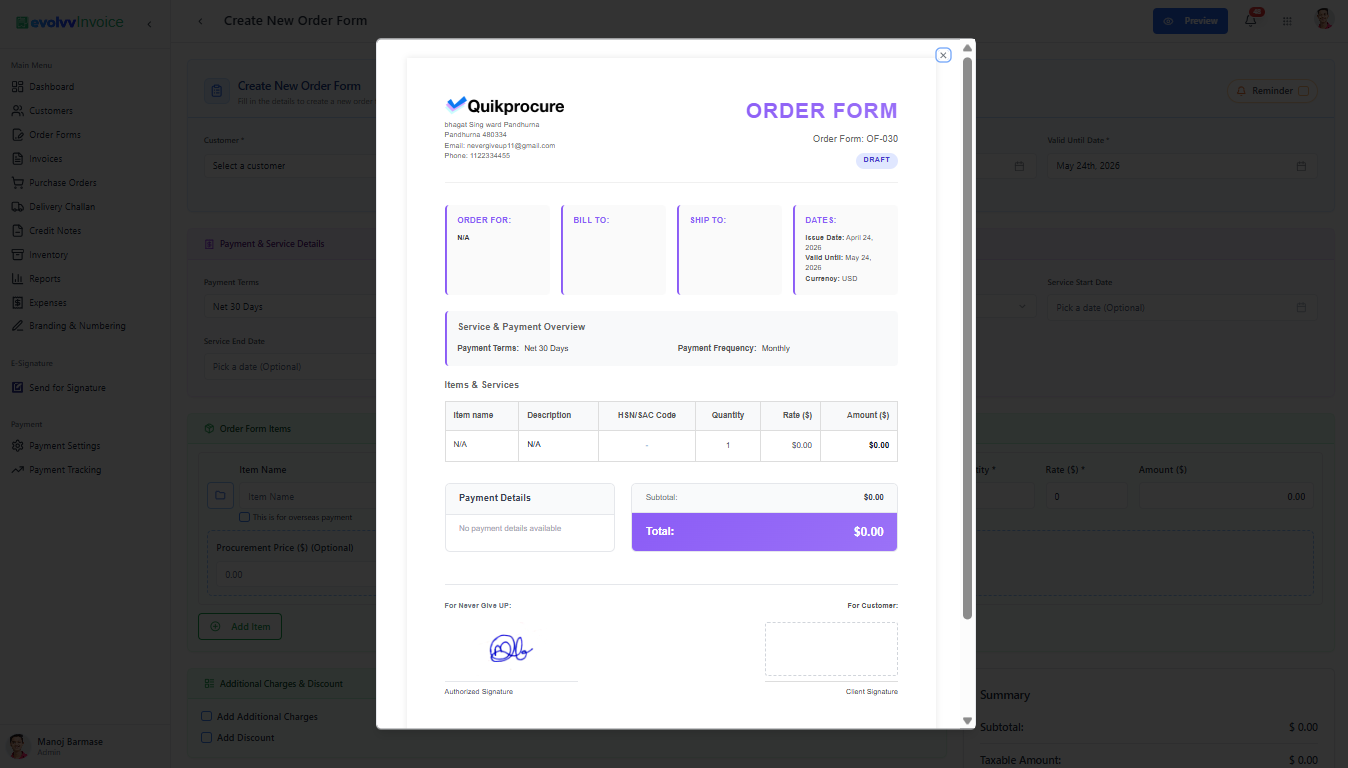
Once everything looks perfect, click Create Order Form!