Creating and Managing Invoices
Billing is the most critical touchpoint you have with your clients. The Evolvv billing platform provides a powerful, legally compliant invoice generator designed to help you get paid faster while maintaining professional branding.
Whether you are billing domestic clients with GST or exporting services overseas, this guide will walk you through the entire invoicing workflow.
1. The Invoices Dashboard
Navigate to Invoices from the left-hand menu. This dashboard is your central hub for tracking all billed revenue.
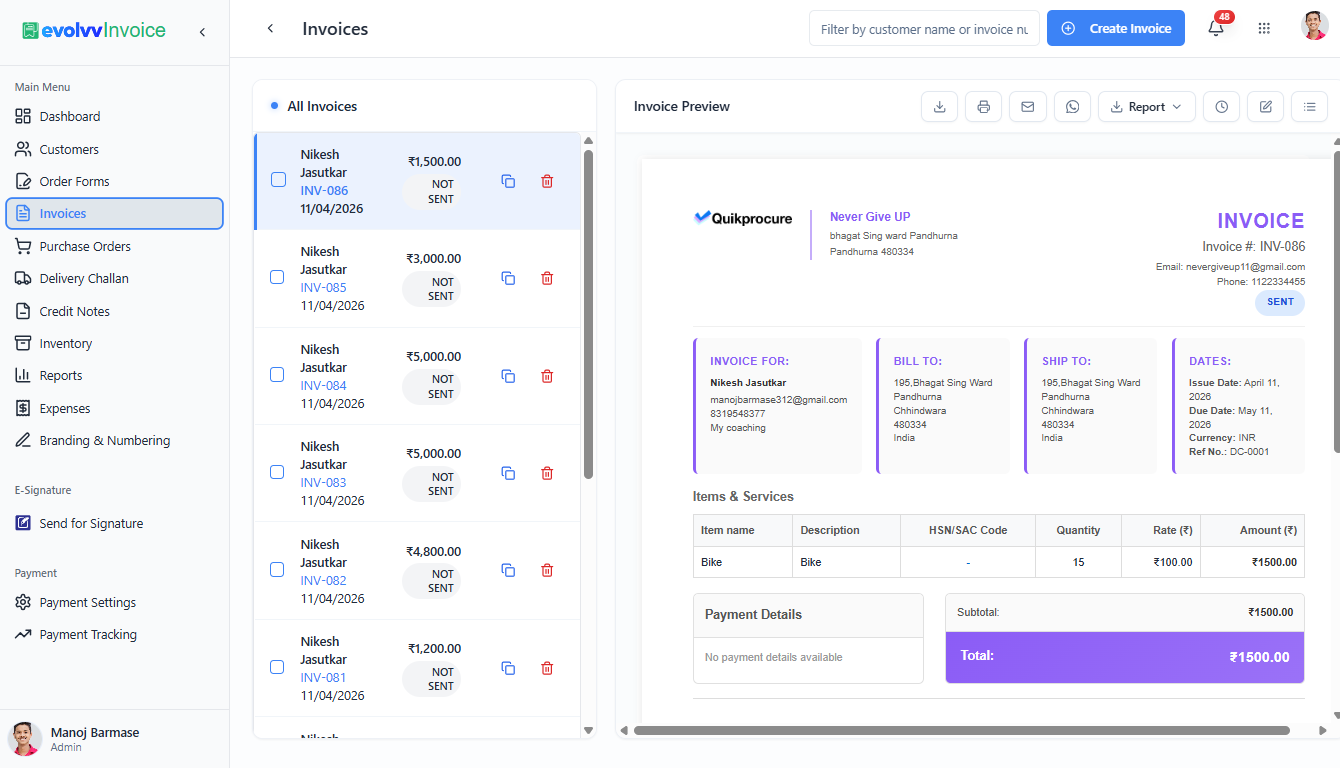
- List View: Quickly identify the status of every invoice (e.g., Draft, Not Sent, Sent, Paid).
- Instant Preview: Click on any invoice in the list to view it in the right-hand pane. From here, you can directly download the PDF, print it, or send it via Email/WhatsApp using the quick-action icons at the top.
2. Generating a New Invoice
To draft a new bill, click the blue + Create Invoice button in the top right corner.
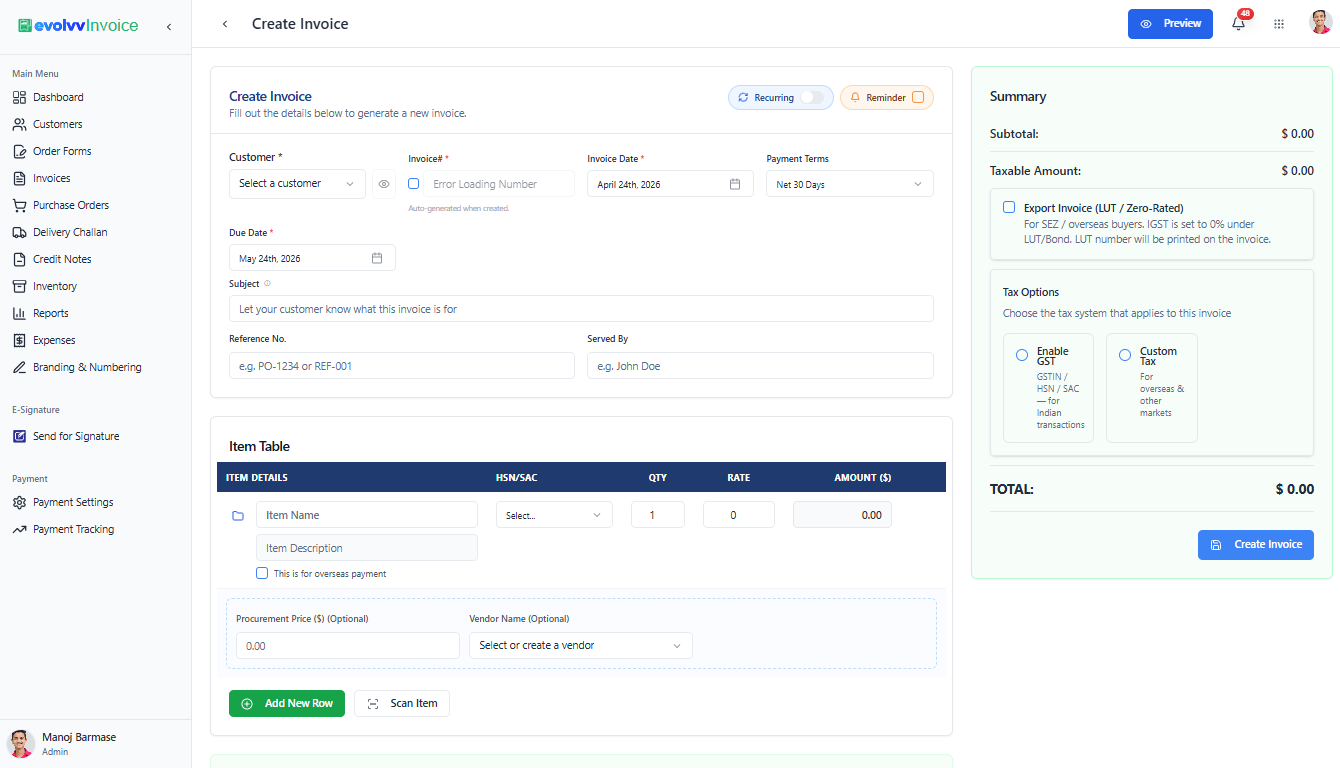
- Customer & Dates: Select a client from your directory. The Invoice Number will auto-generate to prevent duplicates. Set your Invoice Date, Due Date, and standard Payment Terms (e.g., Net 30 Days).
- Subject & Reference: Add a clear subject line and any related Purchase Order (PO) or Reference numbers to help your client process the payment faster.
3. Line Items and Tax Compliance
Scroll down to the Item Table. This is where you detail your products or services.
- Add the Item Name, Description, Quantity, and Rate.
- HSN/SAC Code: Select the appropriate code from the dropdown to ensure strict GST compliance.
- Overseas Payments: If billing an international client, check the "This is for overseas payment" box.
Tax Options (Summary Panel): Evolvv handles complex tax scenarios automatically in the right-hand Summary panel.
- Enable GST: For domestic transactions.
- Export Invoice (LUT / Zero-Rated): If you are an Indian business exporting services under a Letter of Undertaking (LUT), check this box. IGST will be set to 0%, and your LUT number will be legally printed on the final invoice.
- Custom Tax: For non-GST regions or custom tax frameworks.
4. Advanced Settings and Payment Collection
The bottom section of the builder allows you to fine-tune the agreement.
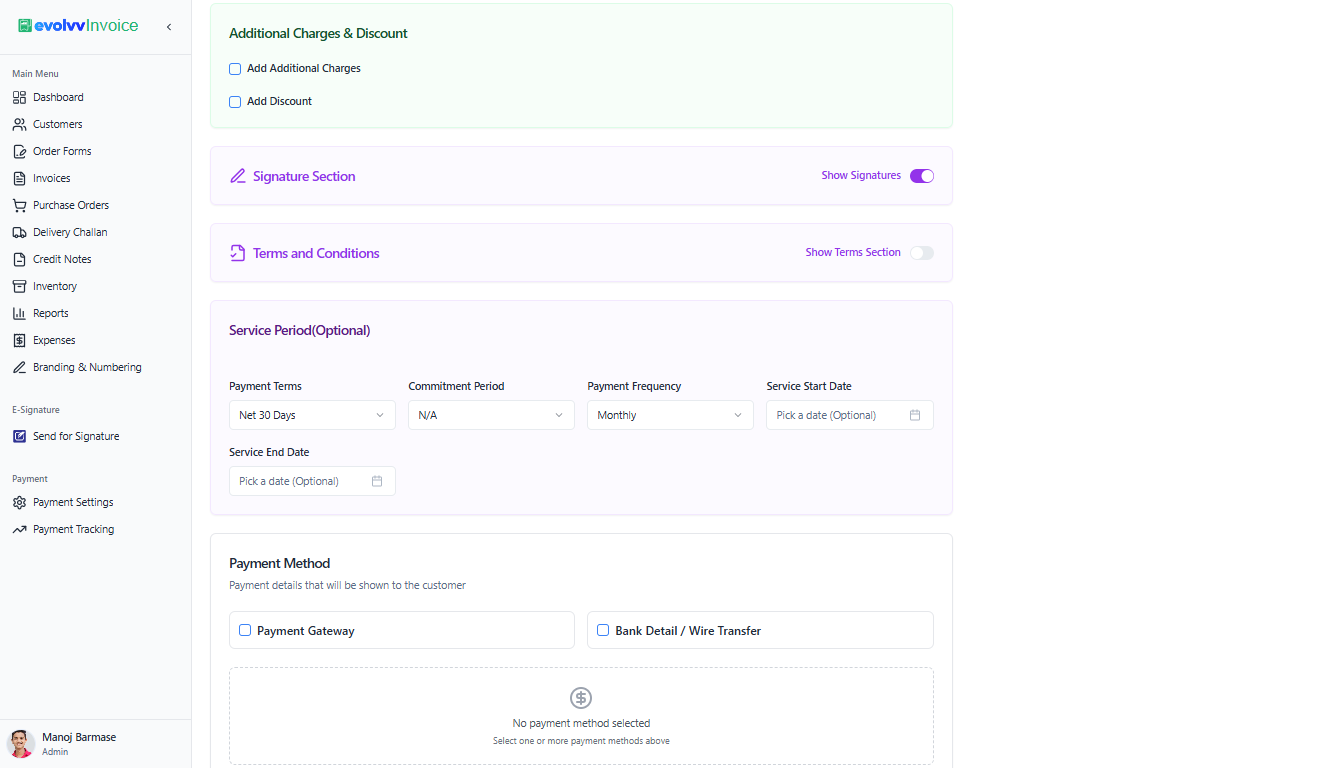
- Additional Charges & Discounts: Easily apply flat or percentage-based discounts and shipping fees.
- Service Period: For retainer or subscription-based services, clearly define the Service Start and End dates to avoid disputes.
- Payment Method: Choose how the client should pay. You can enable a Payment Gateway for instant credit card/UPI processing, or display Bank Detail / Wire Transfer instructions directly on the document.
5. Preview and Finalize
Before hitting send, always use the Preview button at the top of the screen.
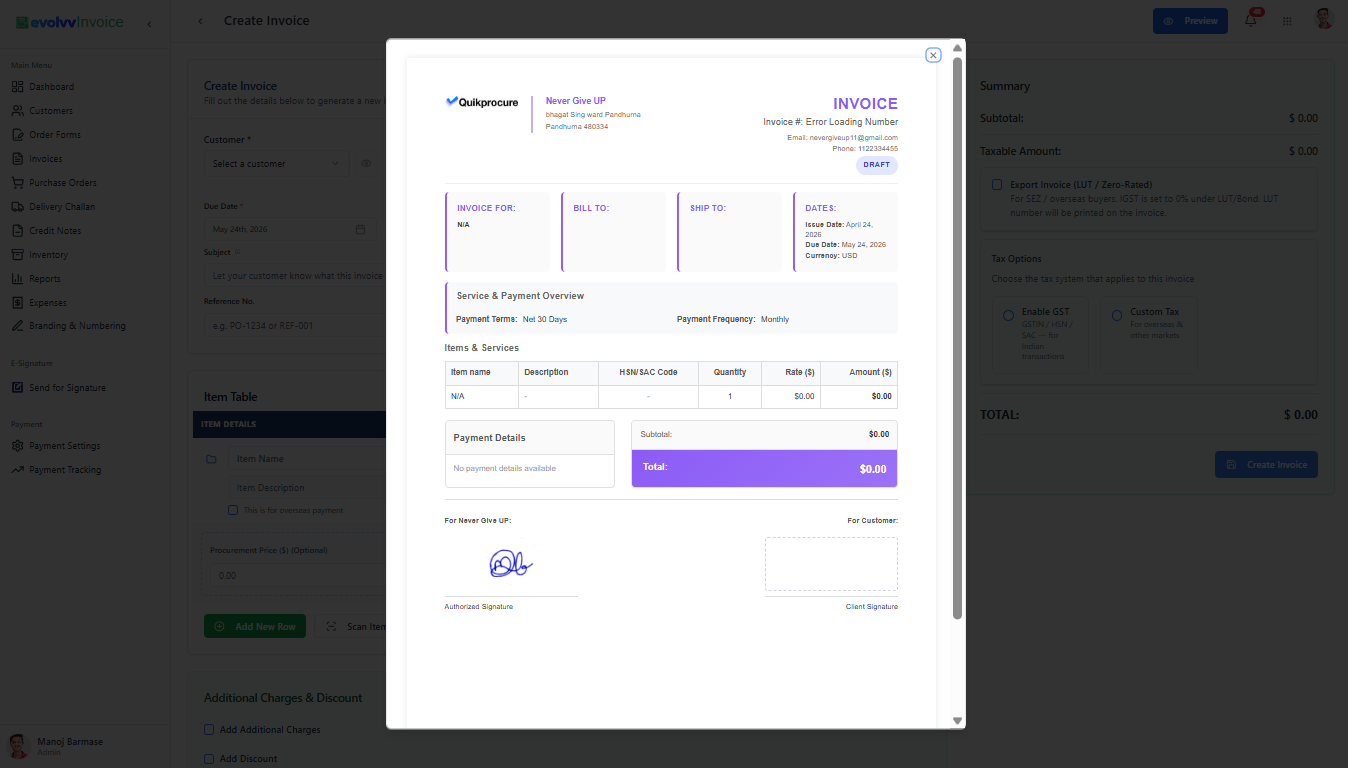
This modal shows you exactly what your client will receive, including your company branding, the authorized signature, and the calculated tax breakdown. Once verified, click Create Invoice to finalize the document!