How to Use the "Sign Yourself" Feature
Sometimes you don't need to request a signature from a client—you just need to apply your own legally binding signature to a document and download it.
The Evolvv electronic signature platform offers a dedicated Sign Yourself workflow. This feature allows you to bypass the standard routing process, add your digital signature to any PDF or invoice, and generate an executed document in seconds.
Here is how to instantly self-sign your documents.
Step 1: Initiate the Self-Sign Process
Navigate to your E-Signatures Dashboard from the main menu.
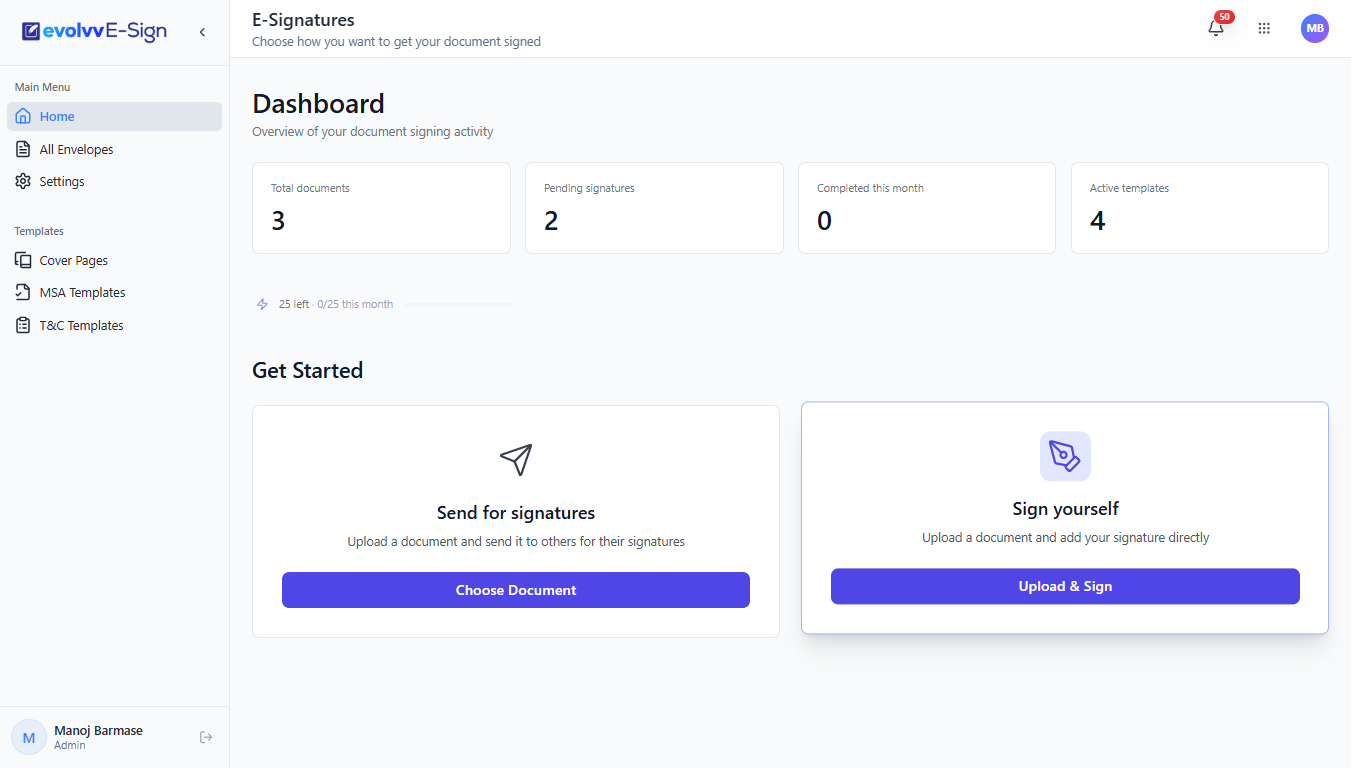
Under the Get Started section, locate the Sign yourself card on the right. Click the blue Upload & Sign button to launch the dedicated self-signing workspace.
Step 2: Upload or Import Your Document
You need to bring the document into the secure signing envelope.
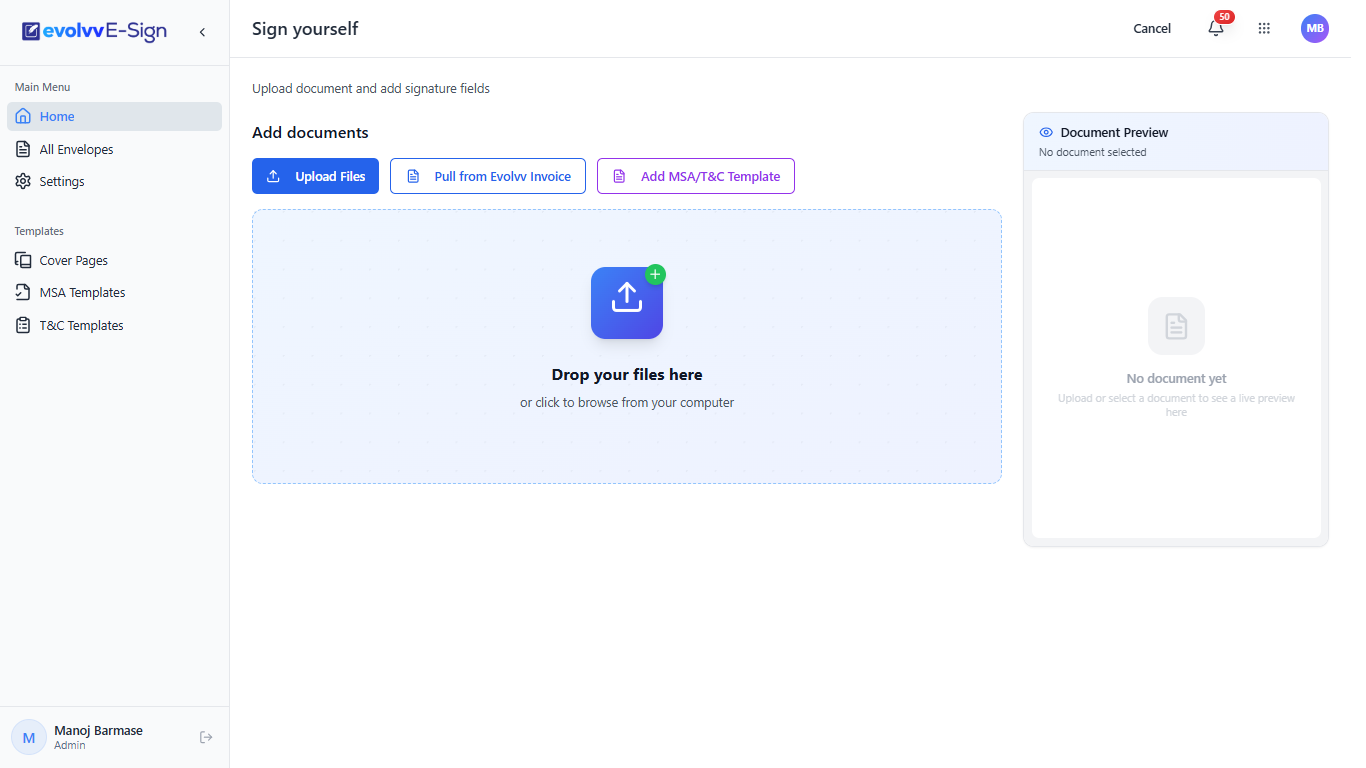
You have three flexible options to add your file:
- Upload Files: Drag and drop a local PDF or Word document from your computer.
- Pull from Evolvv Invoice: Directly import an invoice you previously generated within the platform.
- Add MSA/T&C Template: Inject one of your pre-saved standard templates.
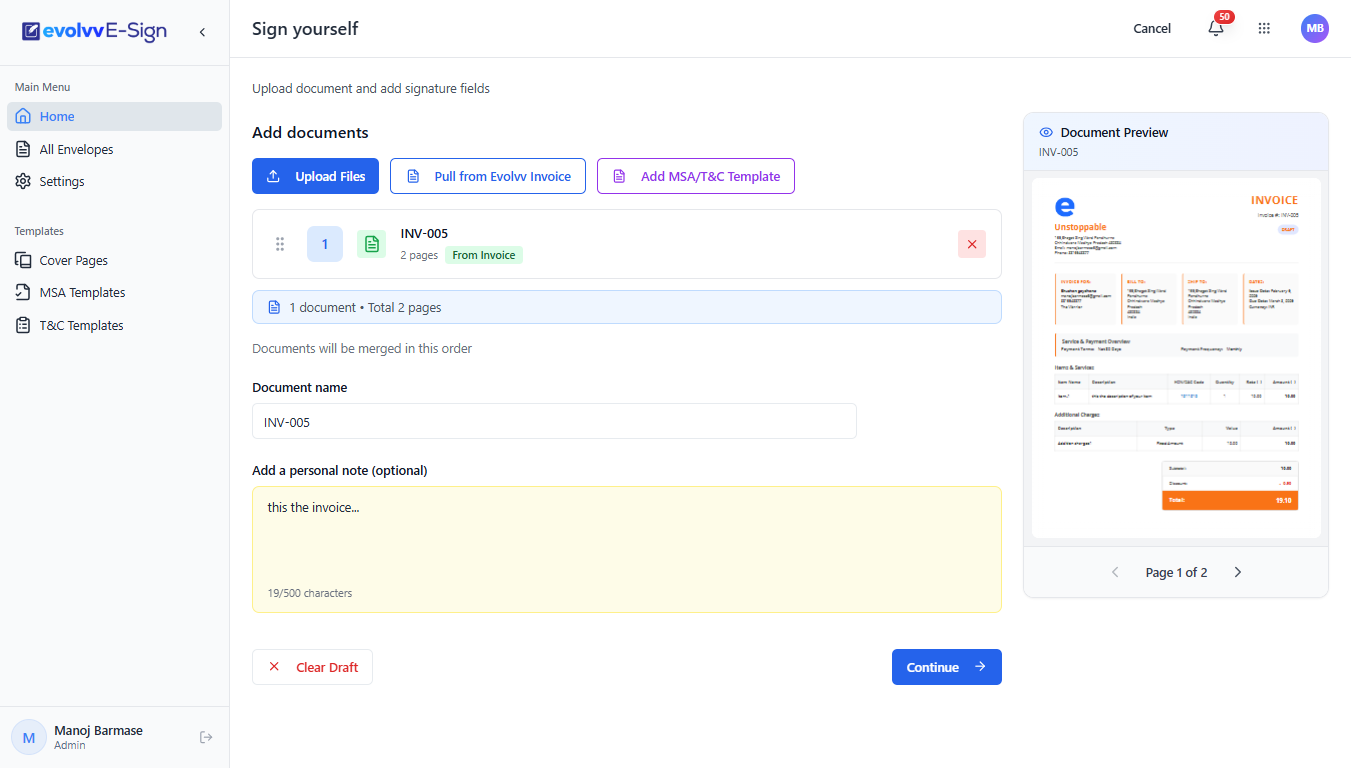
Once selected, your document will appear in the queue. You can rename the file in the Document name field or add an optional personal note for your records. Click Continue to proceed.
Step 3: Place Your Signature Fields
The system will load your document into the visual Field Builder. Because you selected "Sign Yourself," the system automatically assigns all placed fields to you.
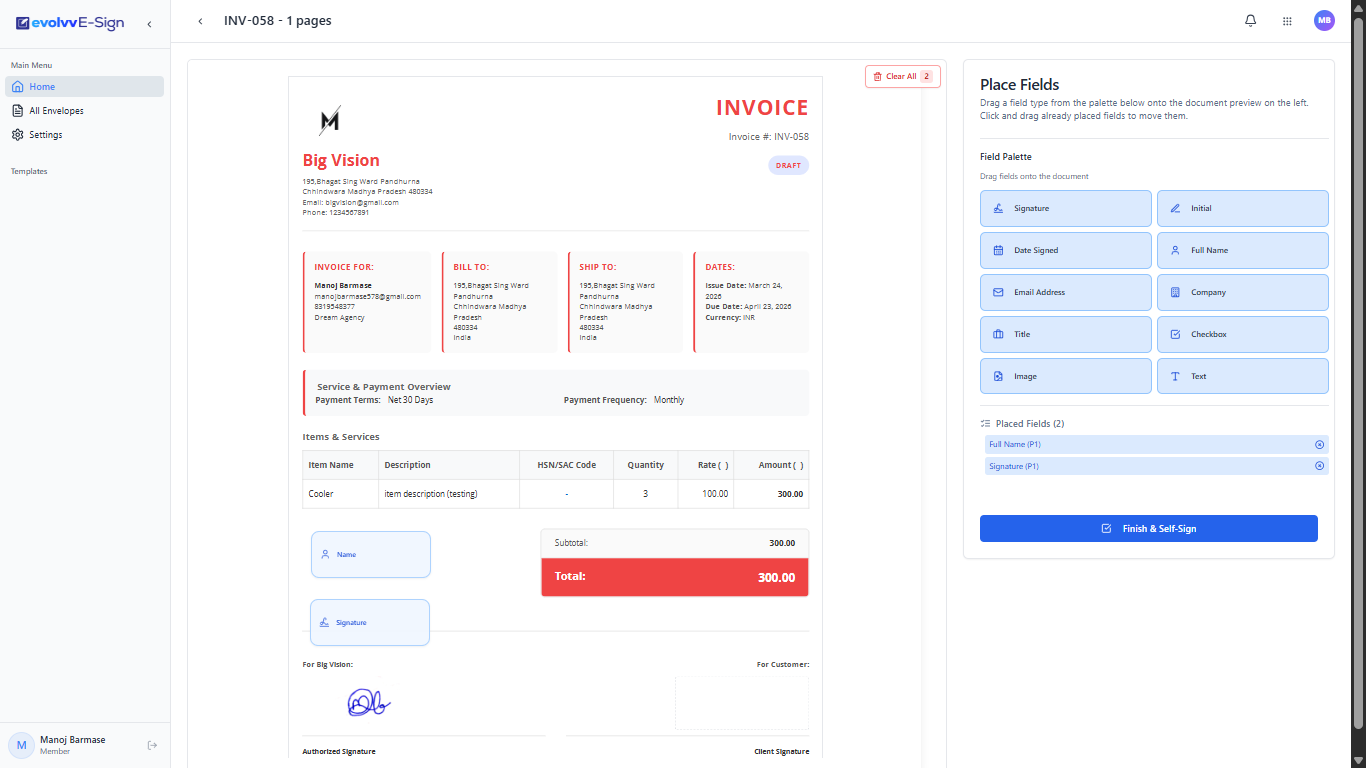
- Look at the Field Palette on the right side of your screen.
- Click and drag the required fields (such as Signature, Full Name, or Date Signed) directly onto the document preview.
- Reposition the fields as necessary to align perfectly with your document's formatting.
Once your fields are placed, click the blue Finish & Self-Sign button at the bottom of the right panel.
Step 4: Execute the Document
You will be seamlessly transitioned into the mobile-optimized signing portal to officially execute the document.
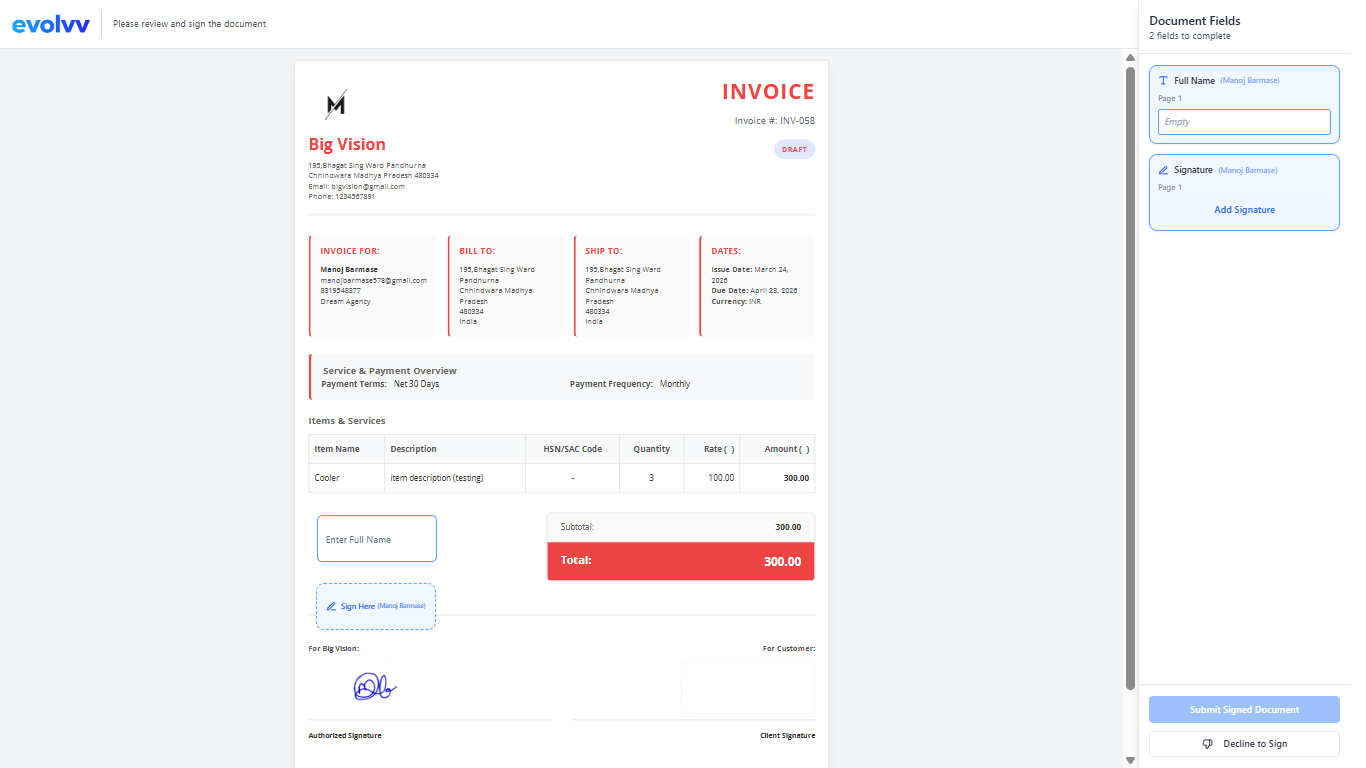
- Click on the highlighted fields on the document to apply your saved signature and name.
- Once all required fields are filled, the Submit Signed Document button at the bottom right will become active. Click it to finalize the process.
Step 5: Download Your Executed File
Congratulations! Your signature is now legally recorded and cryptographically sealed.
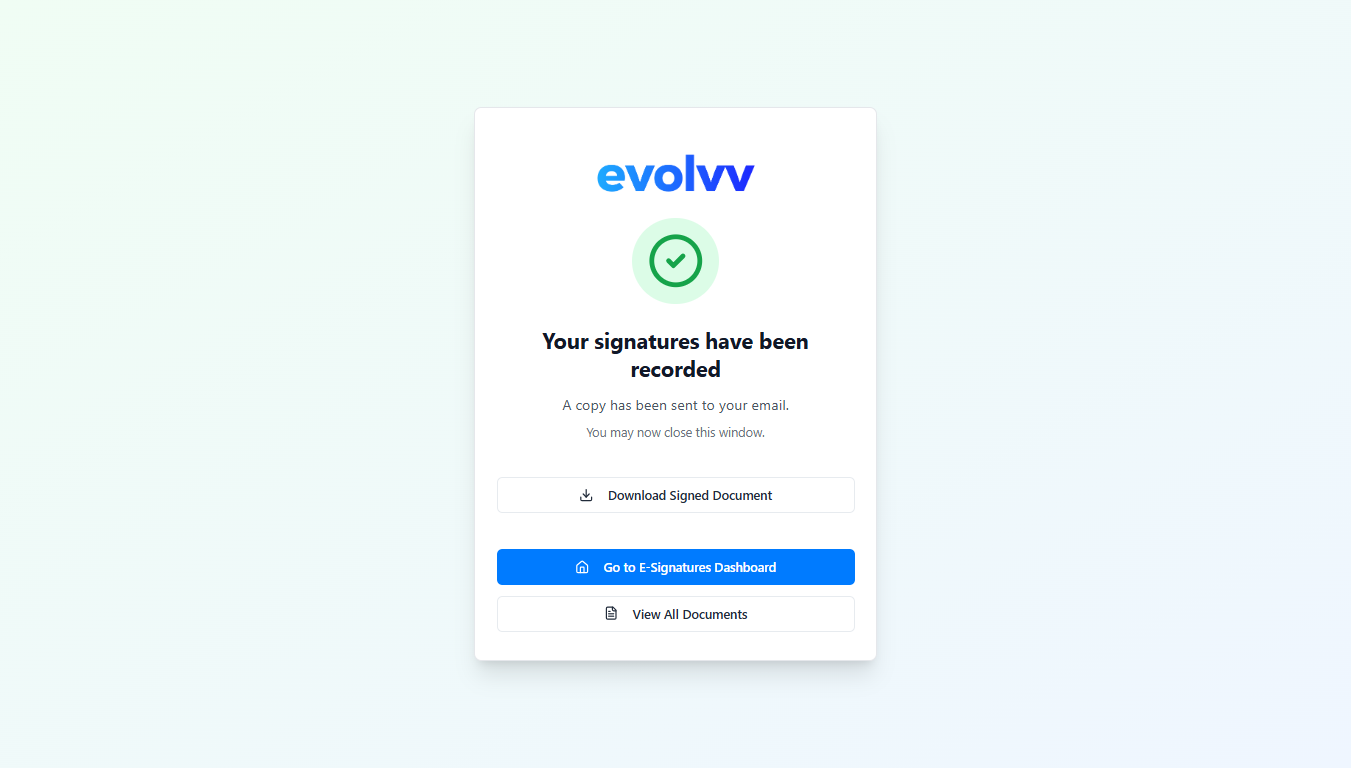
From the success screen, you can immediately click Download Signed Document to save the executed PDF to your local device. A secure backup copy, along with its legal audit trail, is automatically stored in your Evolvv envelope history.
What's Next? Need to track the documents you just signed? 👉 Read Next: Managing and Tracking Your Envelopes