How to Send a Document for E-Signature
Executing a contract shouldn't involve endless email threads and printed PDFs. The Evolvv E-Signature platform provides a streamlined, intuitive workflow to get your documents signed legally and securely in minutes.
Whether you are requesting a single signature or routing a complex agreement through multiple stakeholders, this step-by-step guide covers the entire sending process.
From your E-Sign Dashboard, click the Send for signatures button to begin.
Step 1: Upload Your Document
The first step is bringing your document into the secure envelope.
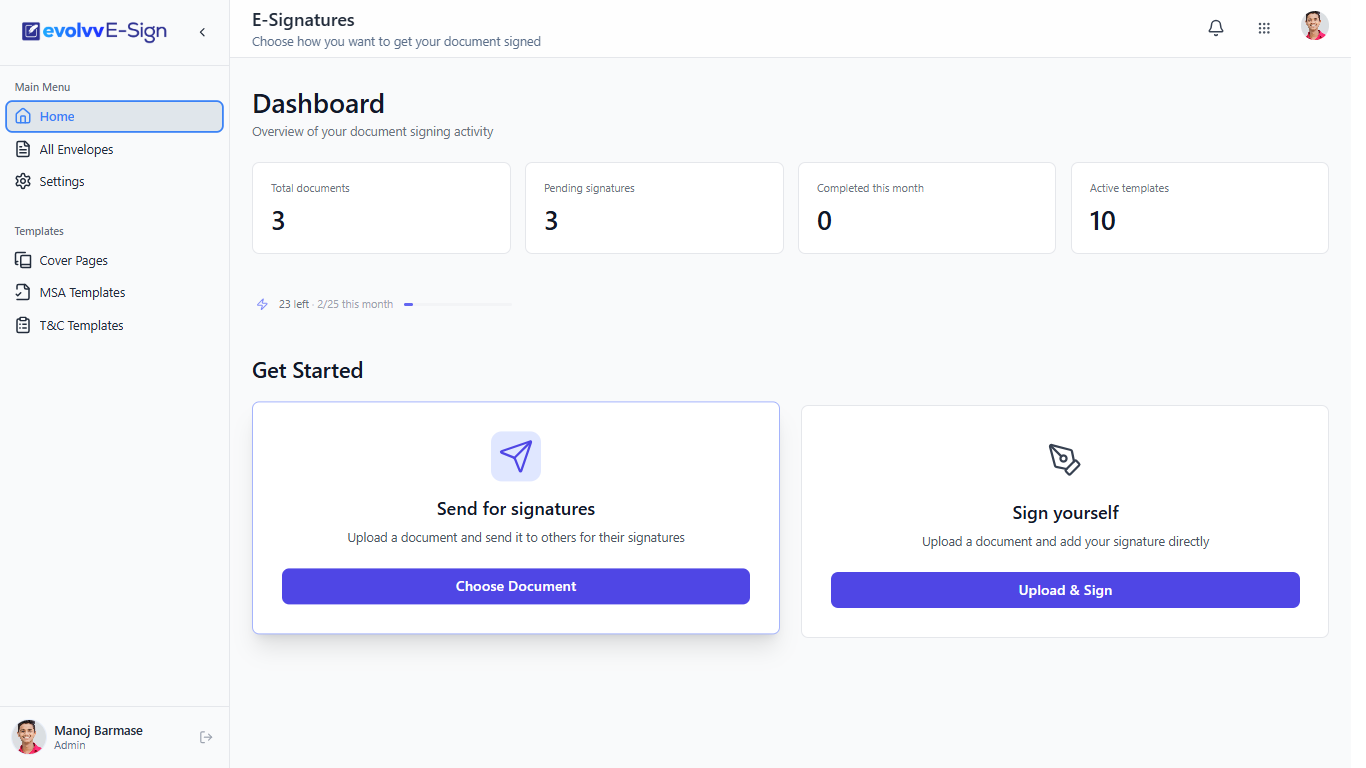
You have three options for adding a document:
- Upload Files: Drag and drop a local PDF or Word document from your computer.
- Pull from Evolvv Invoice: Instantly attach an existing invoice or order form you created within the platform.
- Add MSA/T&C Template: Inject a pre-saved Master Service Agreement or standard Terms & Conditions template.
Once added, the document will appear in the list, and a live preview will generate on the right side of your screen.
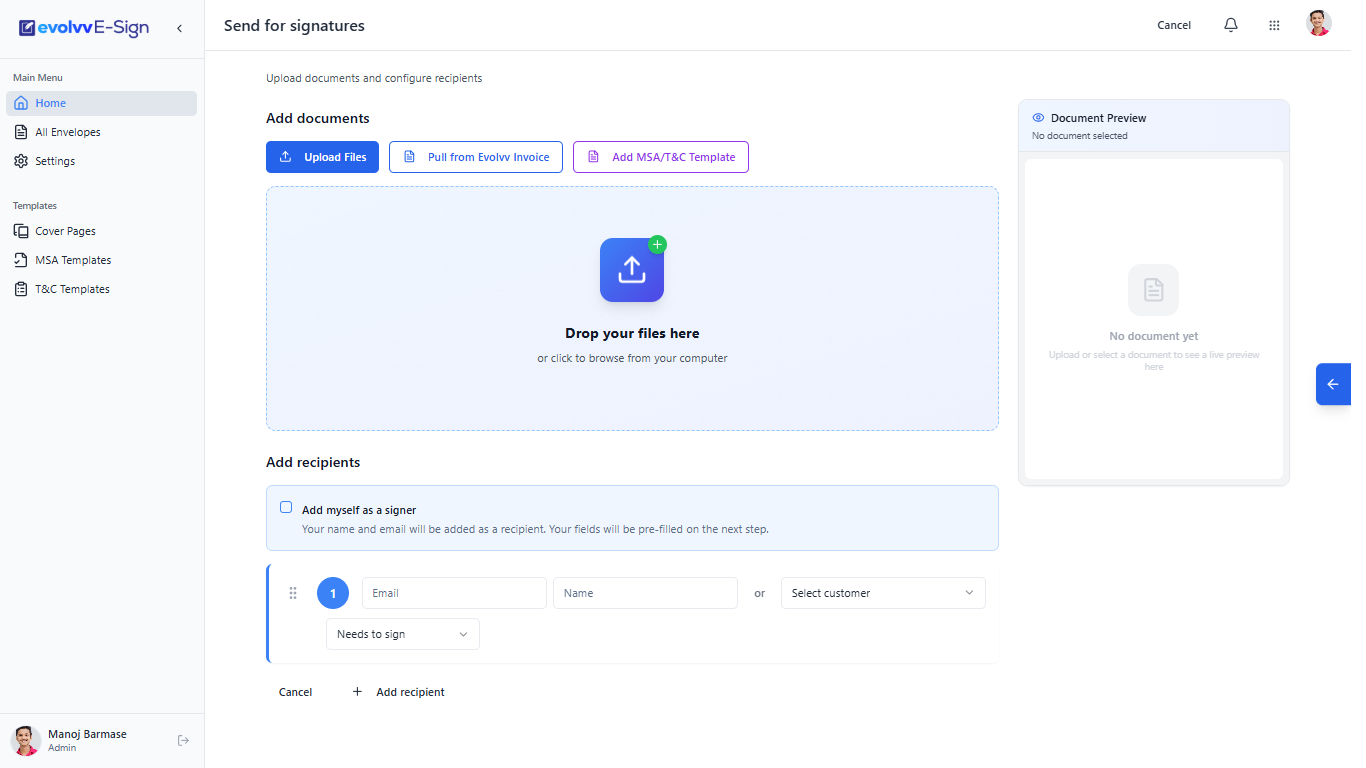
Pro Tip: You can merge multiple documents into a single envelope. Name the combined packet in the "Document name" field and add an optional message that will be included in the notification email.
Step 2: Add Recipients & Configure Routing
Next, you need to define exactly who needs to sign the document and in what order.
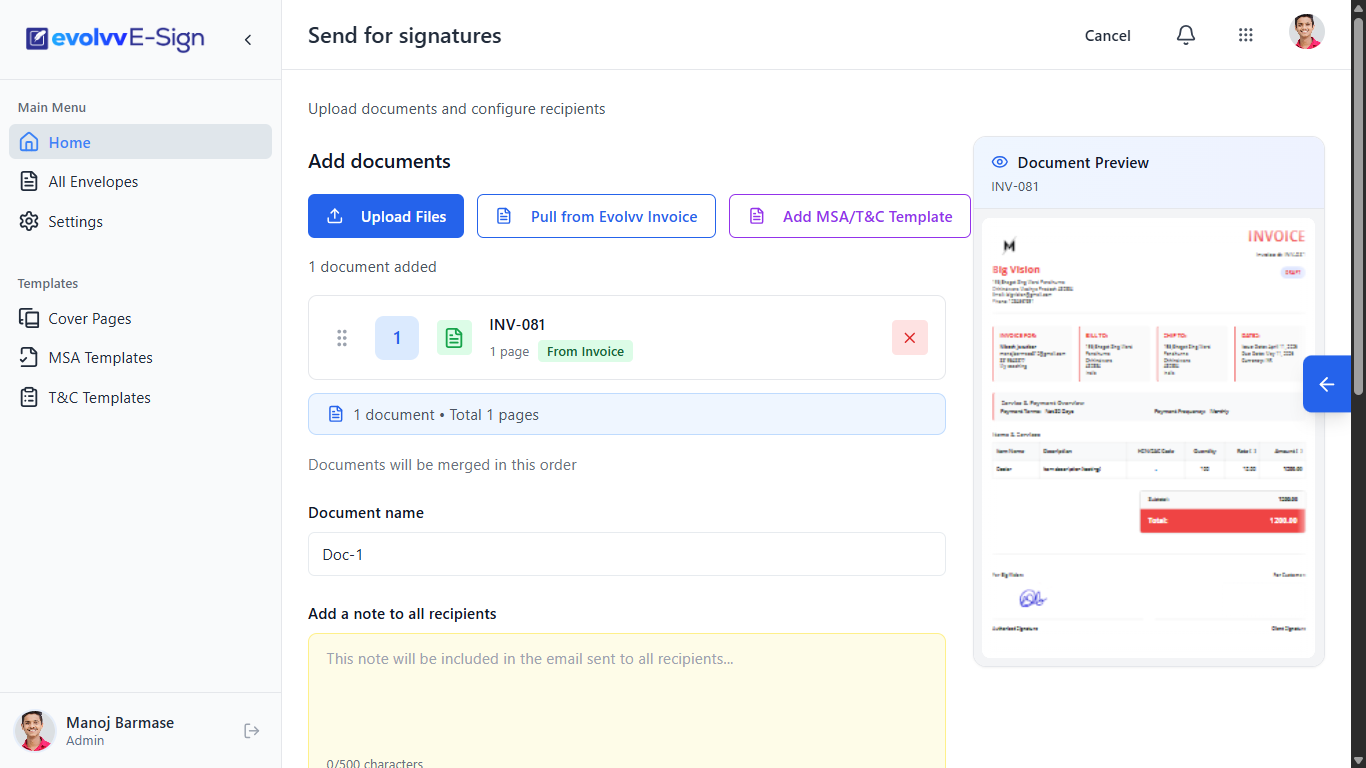
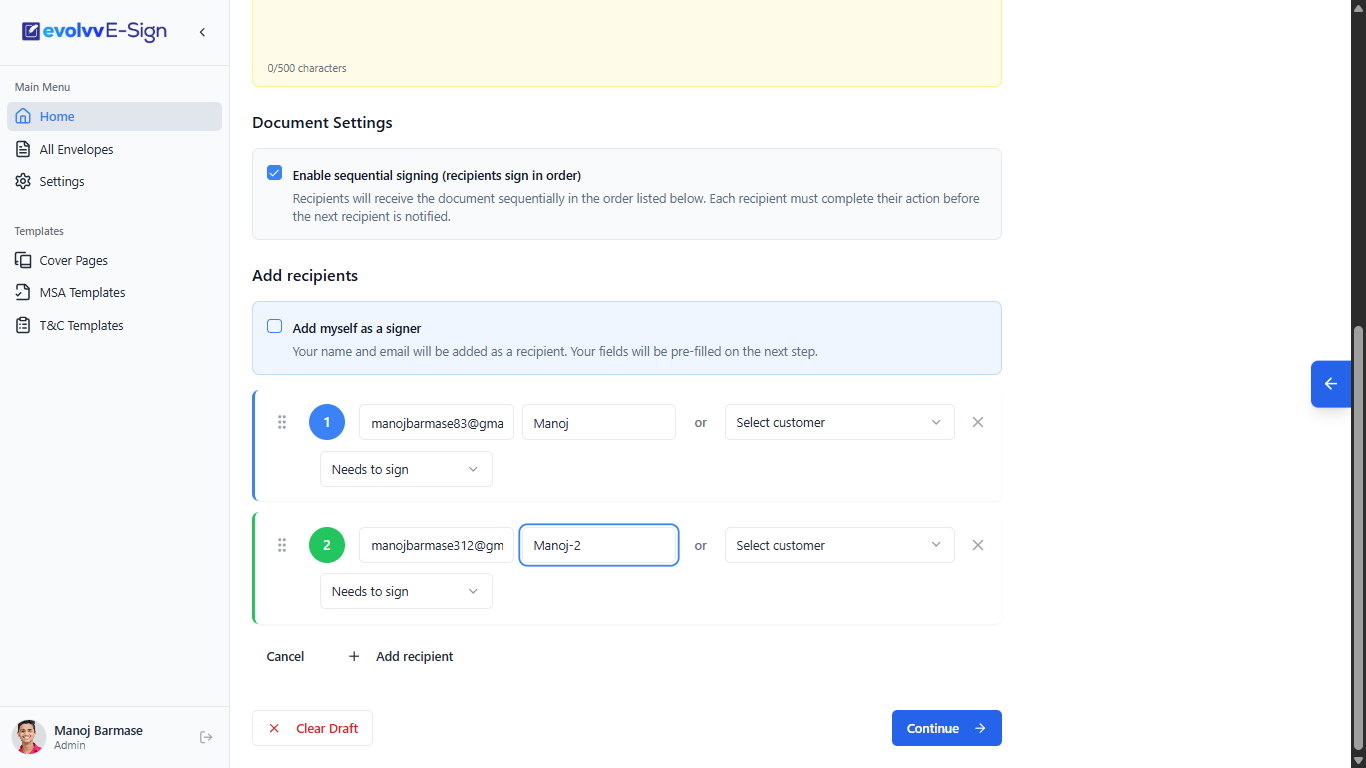
- Adding Signers: Enter the Name and Email of your recipient. You can quickly select an existing client from your CRM directory using the dropdown.
- Add Myself as a Signer: If you also need to countersign the document, check this box to automatically add your profile to the workflow.
- Sequential Signing (Crucial for multi-party agreements): Check the "Enable sequential signing" box under Document Settings. This ensures the envelope is routed in a specific order (e.g., Signer 1 must complete their action before Signer 2 receives the email). You can drag the recipient blocks to adjust this order.
Click Continue when your routing is set.
Step 3: Drag and Drop Signature Fields
This is where you tell your recipients exactly where to sign. The Evolvv Field Builder is highly visual and easy to use.
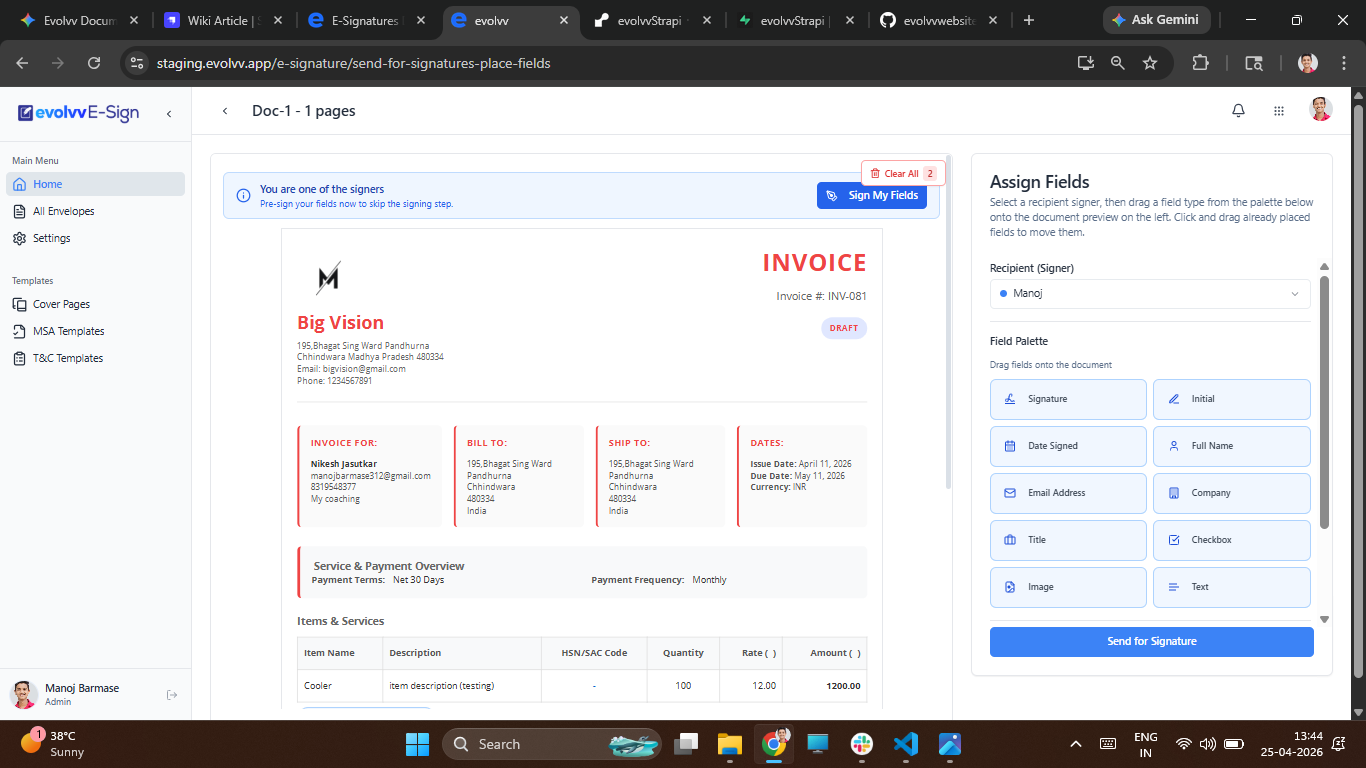
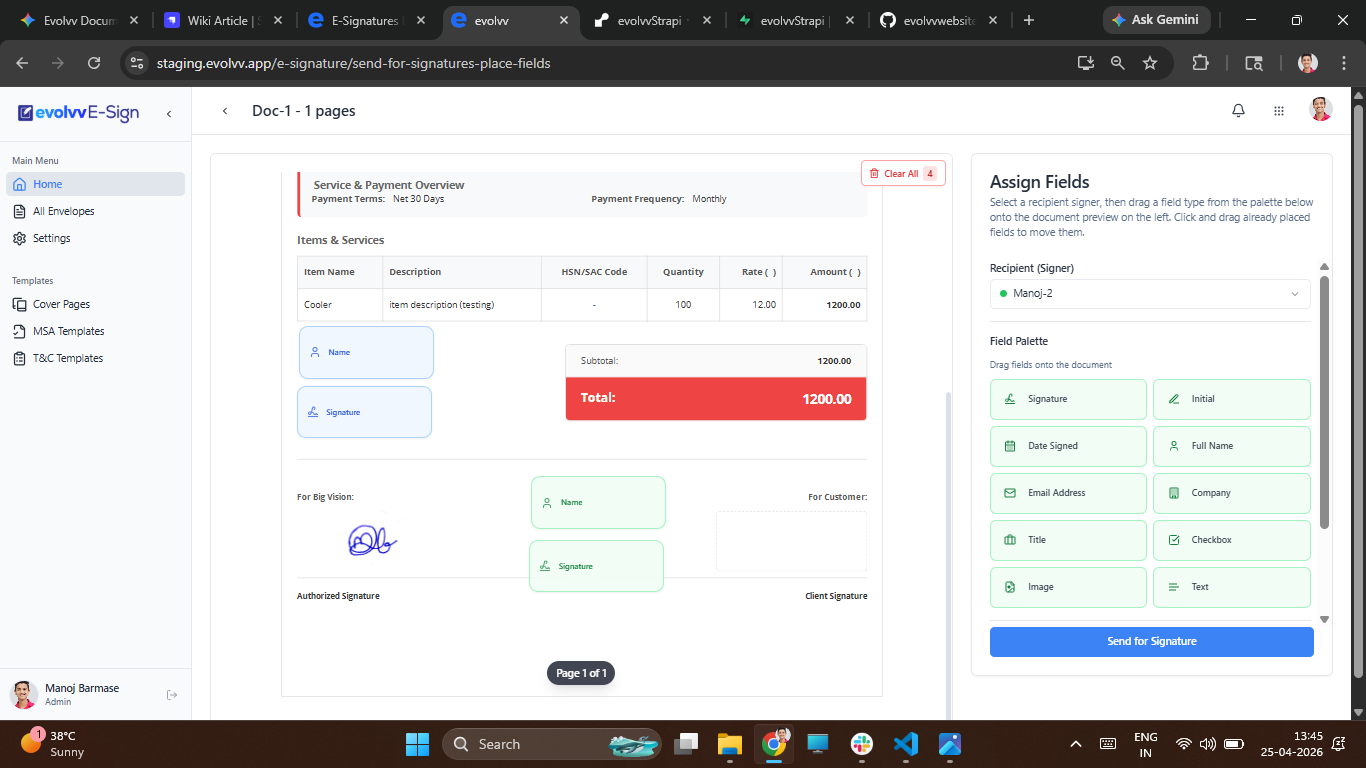
- Select the Signer: Use the dropdown on the right panel to select which recipient you are currently assigning fields for. (Notice how different signers are color-coded, e.g., Blue for Signer 1, Green for Signer 2, to prevent confusion).
- Drag and Drop: Click a field type from the Palette (Signature, Full Name, Date Signed, Checkbox, etc.) and drag it directly onto the document preview.
- Pre-Sign (Optional): If you are one of the signers, you can click "Sign My Fields" at the top to complete your portion instantly before sending the envelope to the client.
Once all fields are placed for all recipients, click the blue Send for Signature button!
Step 4: The Client Signing Experience
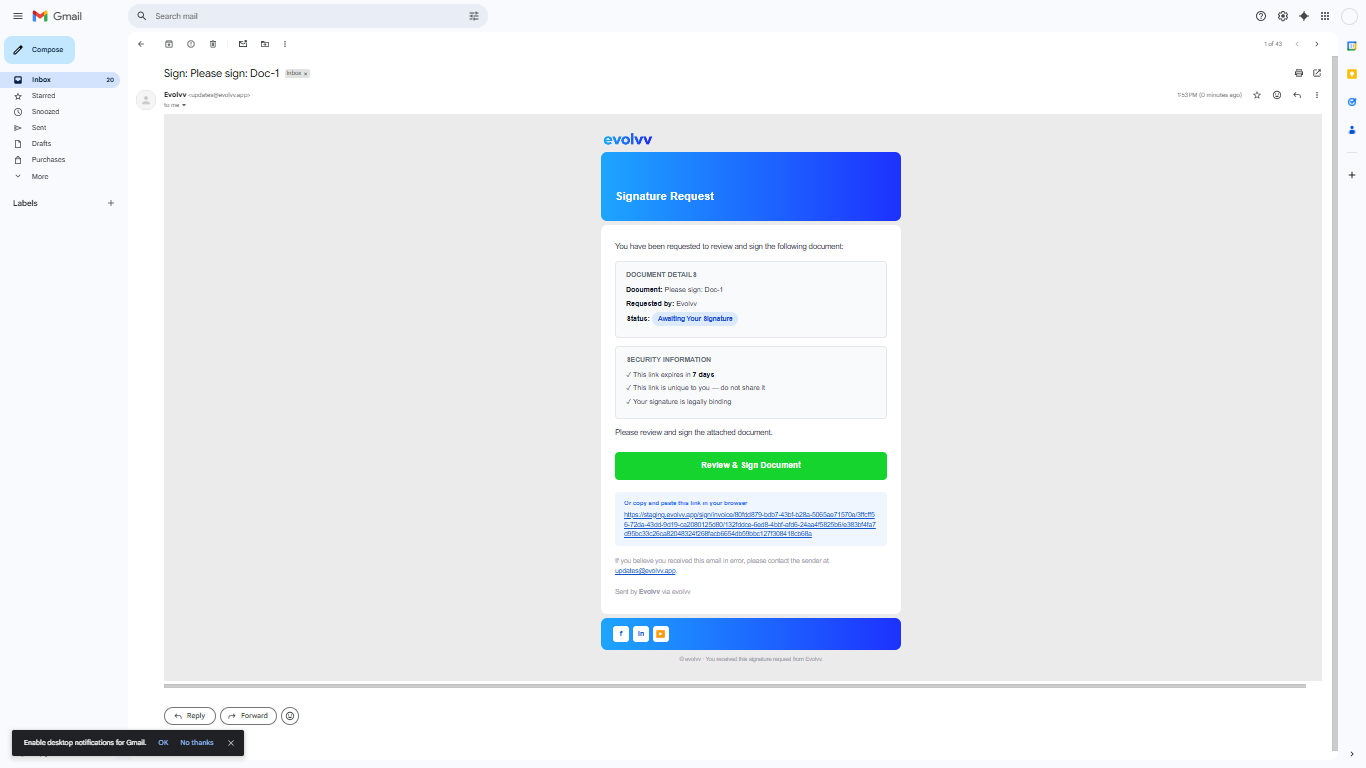
What happens after you hit send? Your client receives a highly professional, branded email notification.
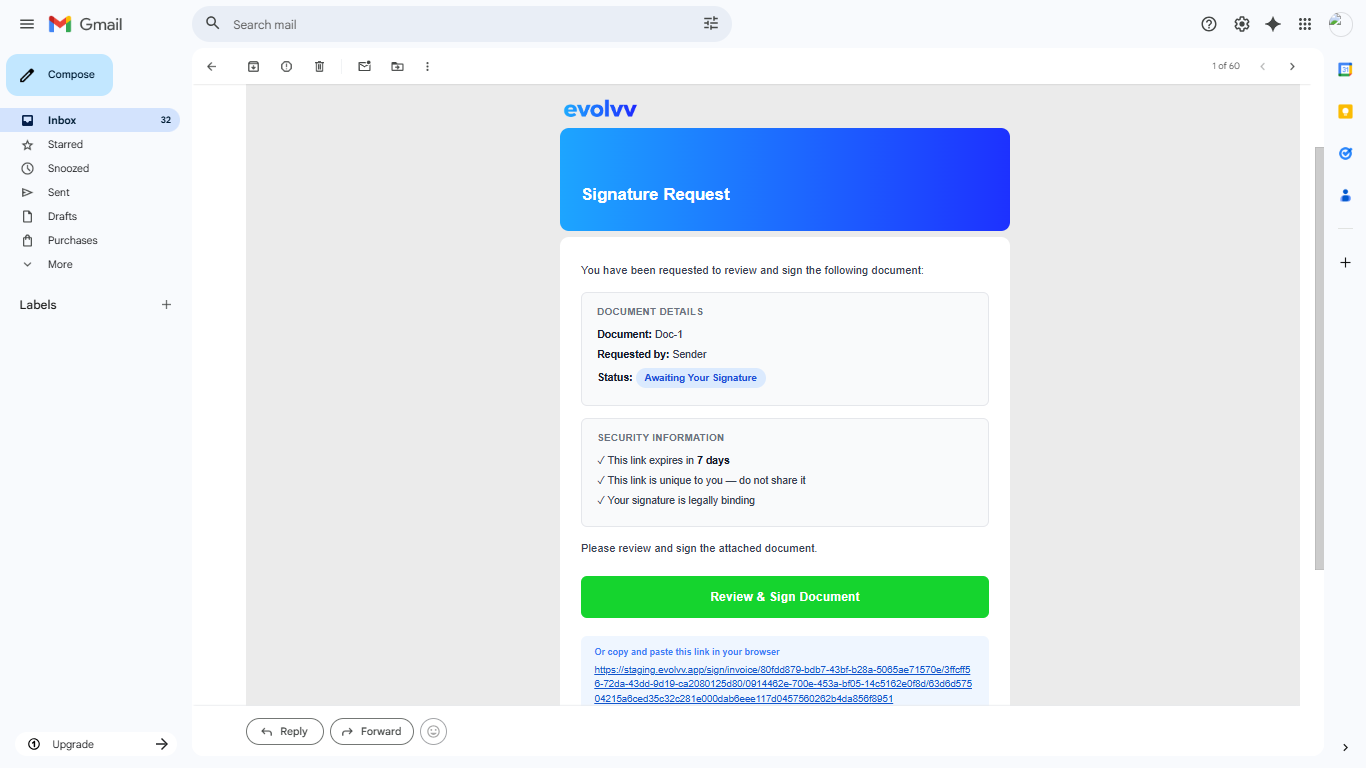
- The email clearly displays the document details, security information (like link expiration), and a prominent Review & Sign Document button.
- Note: If you configured custom branding in your settings, your logo and brand colors will appear here.
When the client clicks the link, they are taken to a secure, mobile-optimized signing portal.
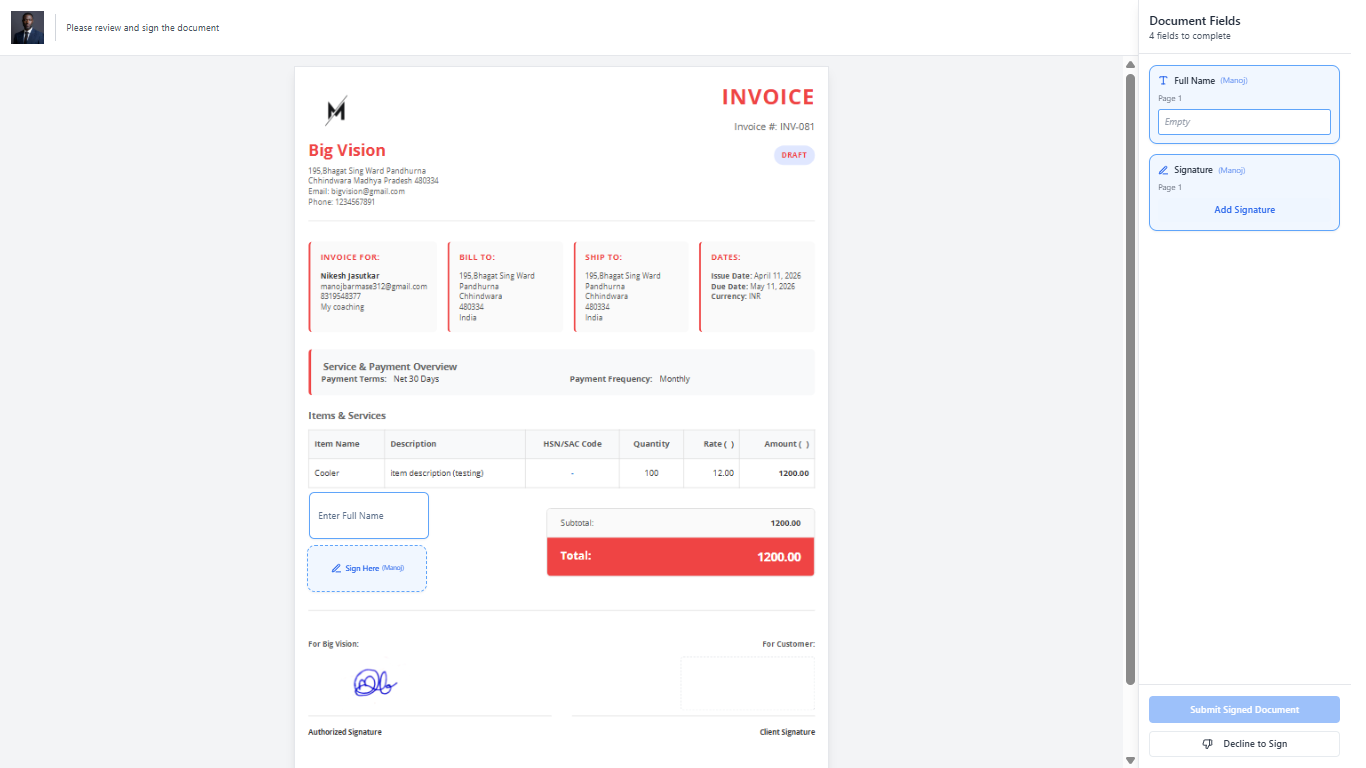
- They do not need an Evolvv account to sign.
- The system automatically guides them to their assigned fields (highlighted in their specific color).
- They simply click the field to adopt a signature, and then click Submit Signed Document at the bottom right to finalize the legally binding agreement.
Once completed, all parties automatically receive a secure PDF copy of the executed document along with the legal audit trail.