Creating and Managing Cover Pages
First impressions matter, especially when sending high-value contracts and Master Service Agreements (MSAs). The Evolvv electronic signature software allows you to attach polished, fully branded Cover Pages to your document envelopes.
Instead of building a cover page from scratch every time, you can create reusable templates. This guide will show you how to design and manage your Cover Page templates to ensure a consistent, professional client experience.
Step 1: The Cover Pages Dashboard
To begin, navigate to the Templates section in your left-hand menu and select Cover Pages.
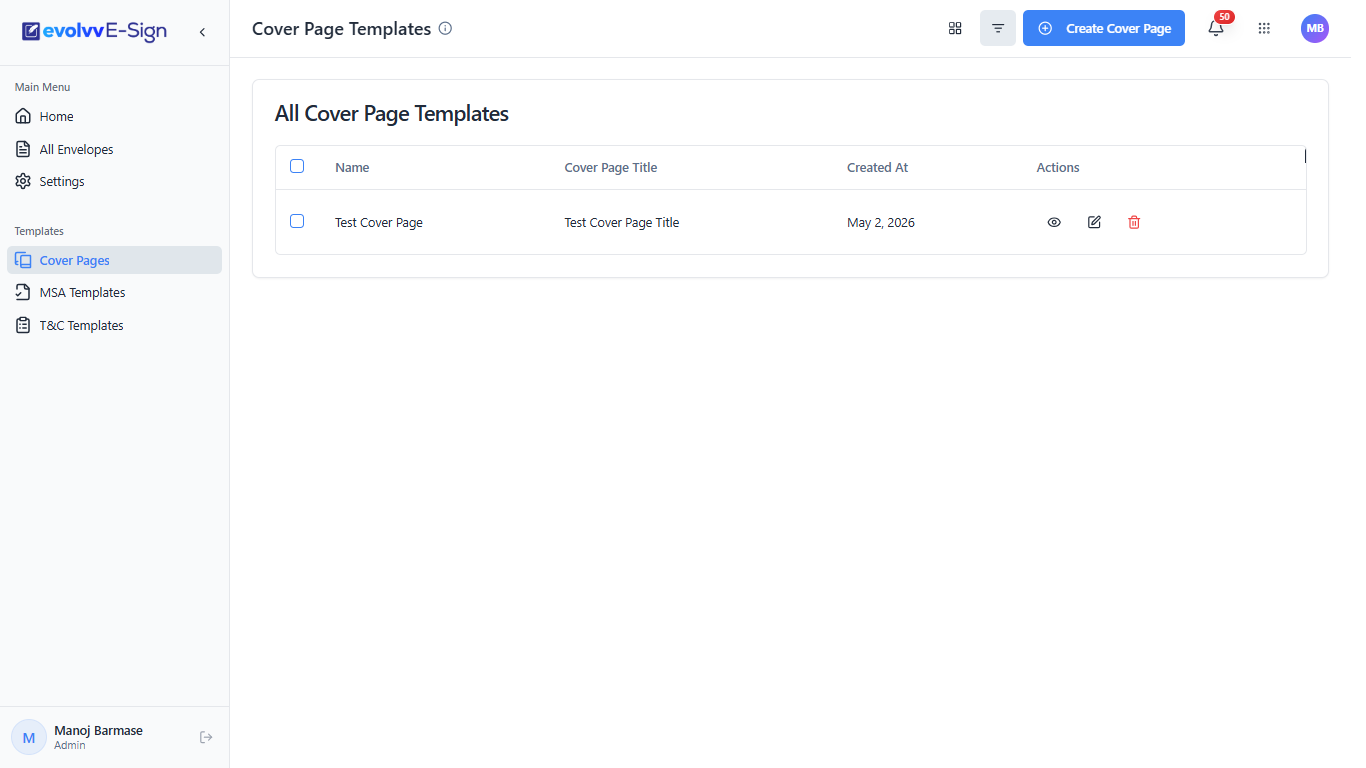
This dashboard acts as your central repository for all existing cover page designs. From here, you can:
- View a list of all saved templates alongside their creation dates.
- Use the quick-action icons on the right to Preview, Edit, or Delete a template.
- Click the blue + Create Cover Page button at the top right to start a new design.
Step 2: Designing a New Cover Page
Clicking the create button opens the template builder. This form allows you to configure both the text and the visual branding of your cover page.
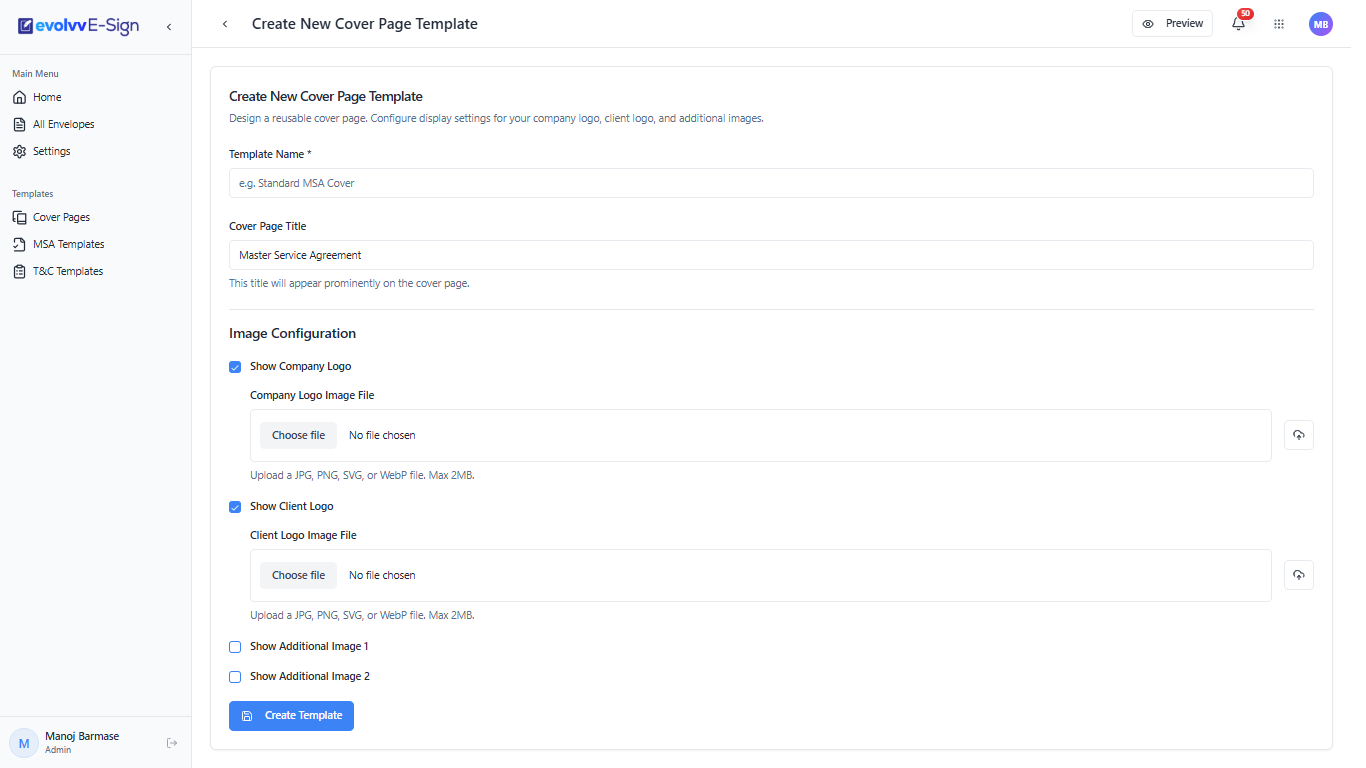
Template Details:
- Template Name: Give your design an internal name (e.g., "Standard MSA Cover") so your team can easily identify it later.
- Cover Page Title: Enter the primary heading that will be displayed prominently to the client on the actual document (e.g., "Master Service Agreement").
Image Configuration & Branding: Evolvv provides dynamic image placements to make your document stand out.
- Show Company Logo: Toggle this on and upload your brand's logo. It will automatically position itself at the top of the page.
- Show Client Logo: Toggle this on to upload the recipient's logo, adding a highly personalized touch to the agreement.
- Additional Images: Use these toggles to inject secondary branding elements, such as product badges or footer graphics. Note that all uploads support JPG, PNG, SVG, or WebP formats up to 2MB.
Click Create Template once your configuration is complete.
Step 3: Previewing Your Design
It is crucial to verify how your cover page will look to the end client before attaching it to a live envelope.
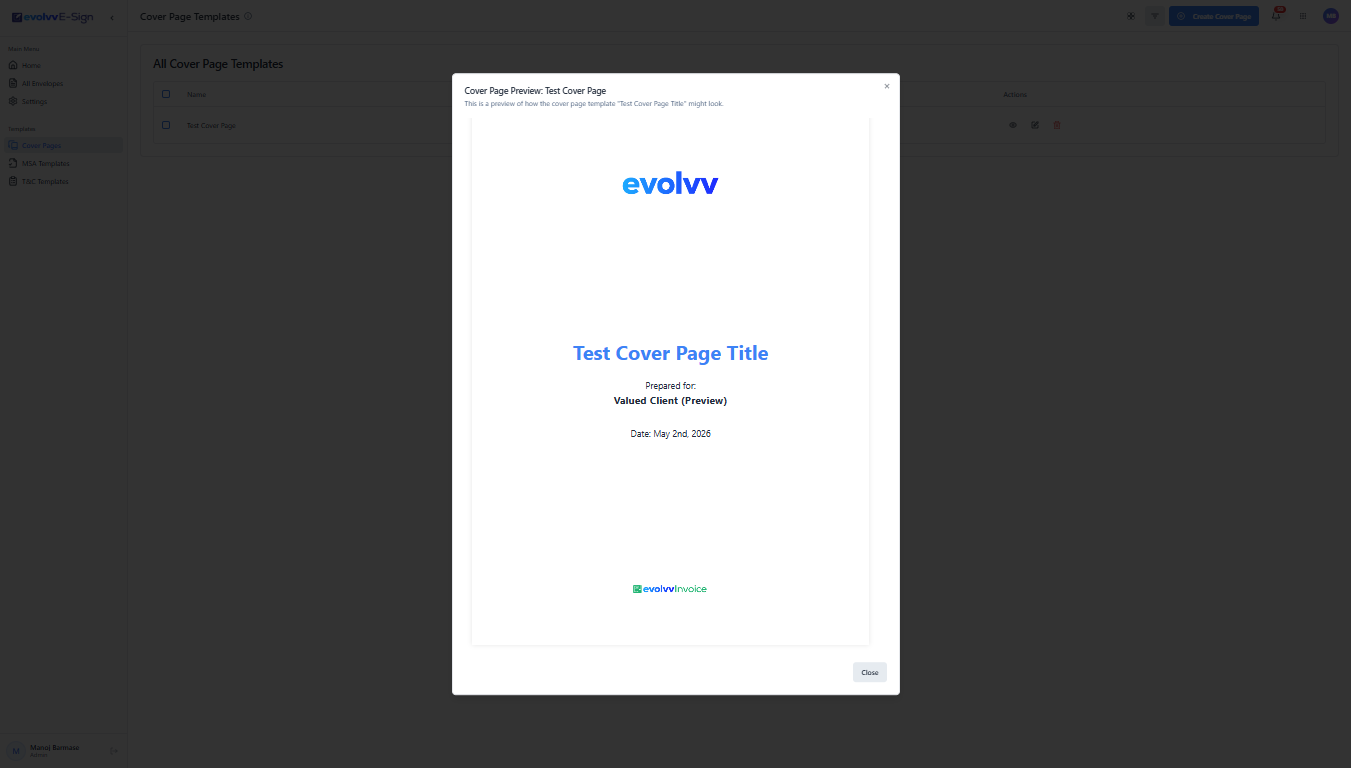
From the main dashboard, click the eye icon (Preview) next to your newly created template. A modal will appear showing exactly how the dynamic elements combine.
You will see your uploaded logos, the bold cover page title, and automated placeholders for the client's name and the document's date. If everything looks perfect, your template is now ready to be attached to your next signature request!